• Approval Flow defines the hierarchy of approval, setting rules and thresholds for approval, integrating with financial systems, ensuring compliance with policies and regulations, and providing transparency and accountability in the approval process.
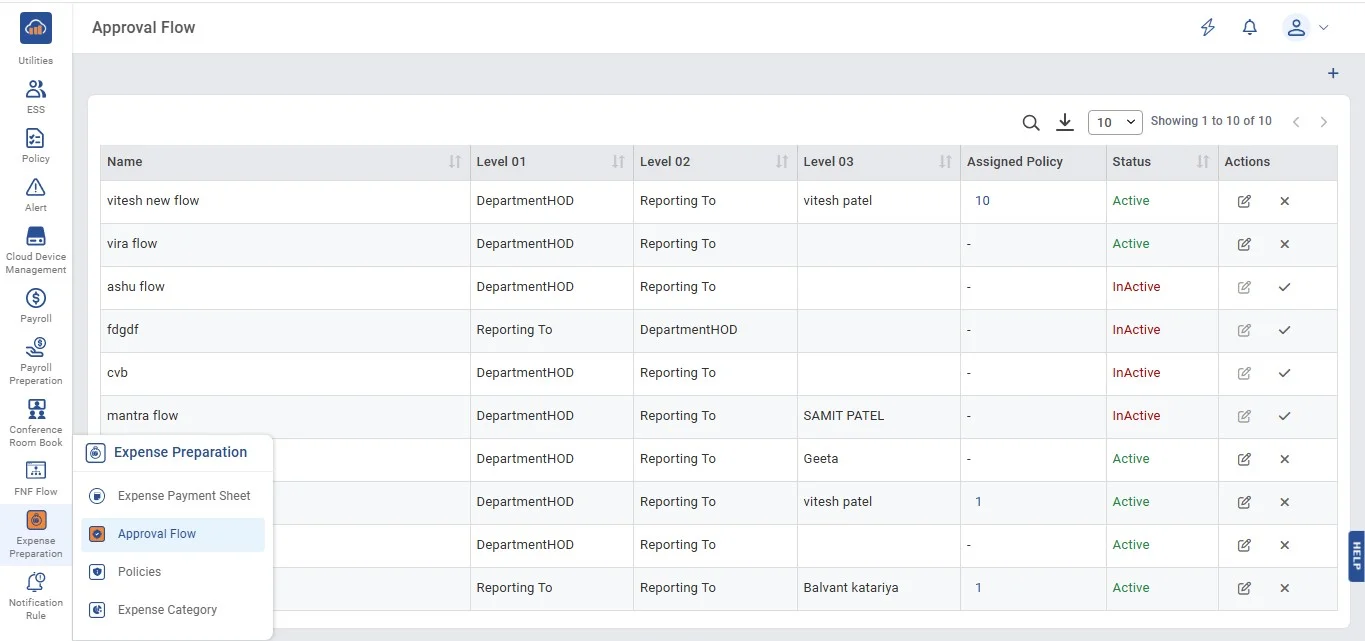
• The following page gets open when one selects on the "Approval Flow" from side navigation under "Expense Preparation" which is primary navigation.
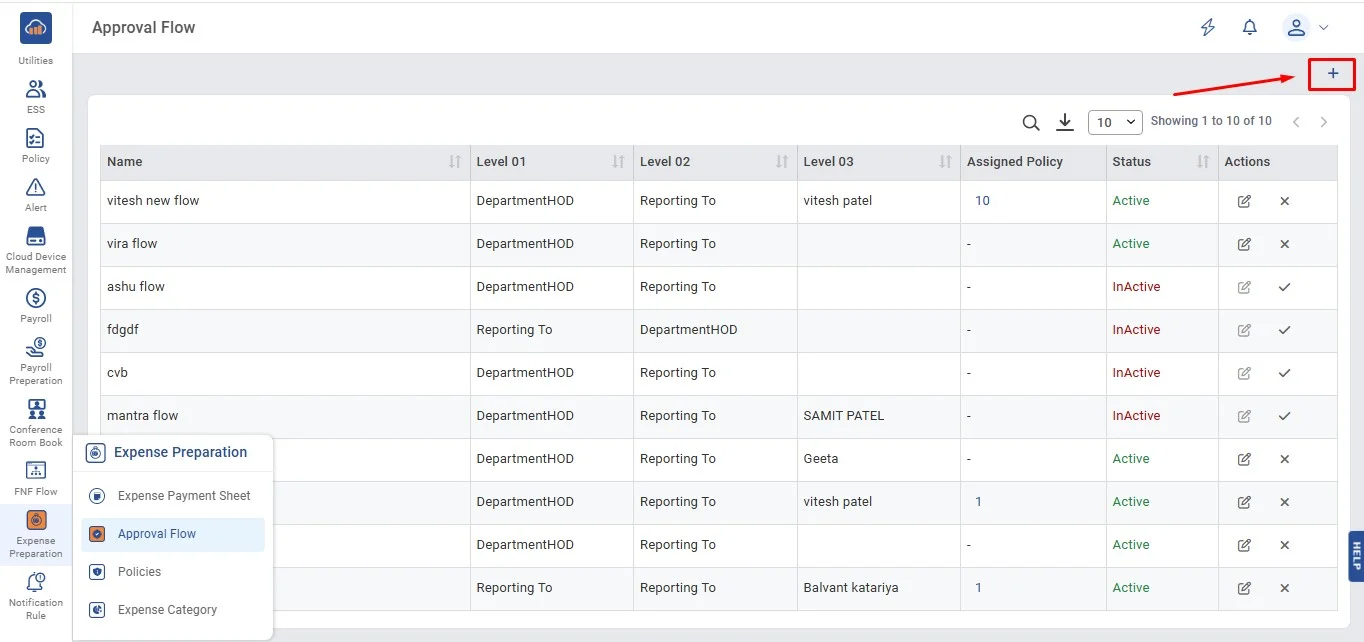
• Then click "Add Approval Flow" button at the top right to add flow.
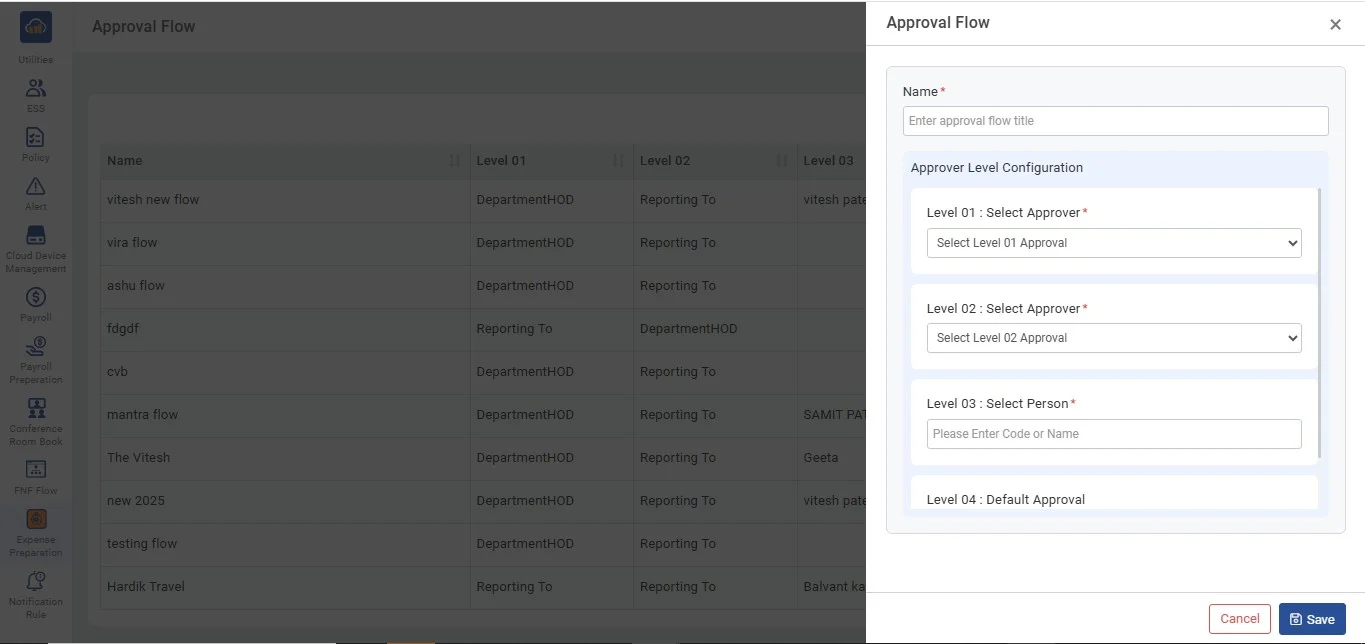
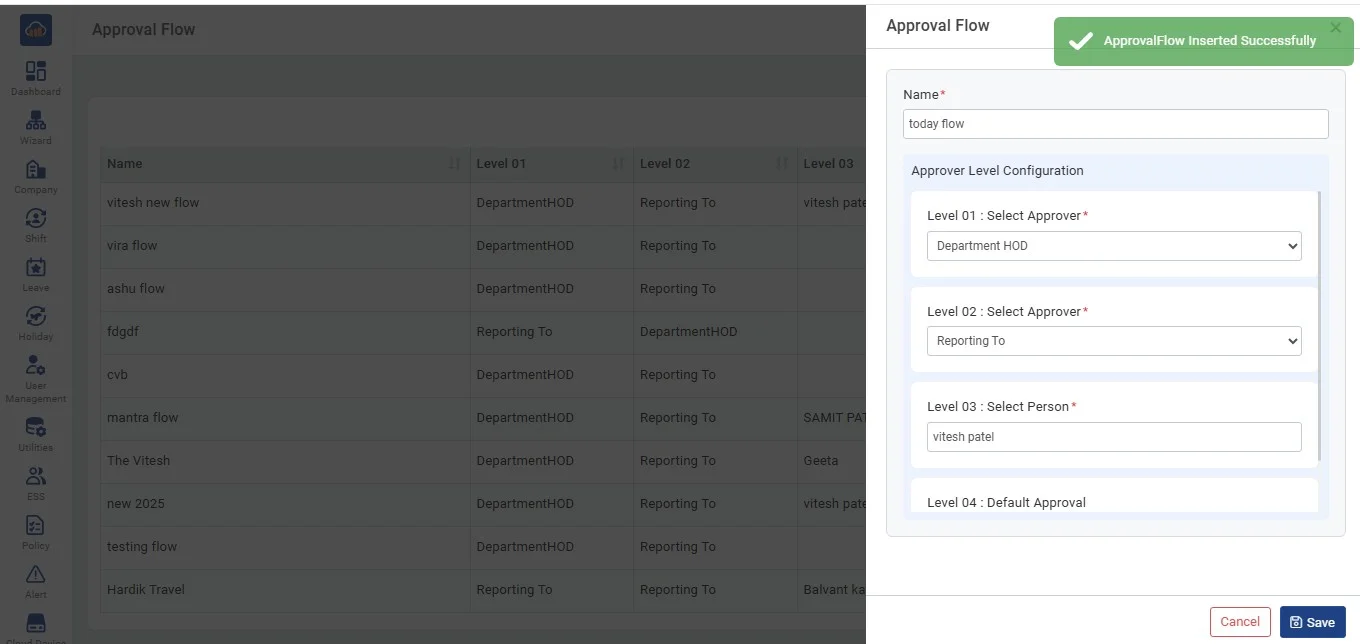
• After clicking on "Approval Flow" a modal gets open that showcases the fields to be filled to create approval flow.

• After entering all details to the mandatory and non-mandatory fields click on "Add Approval Flow" to create the flow. Click on "Cancel" button if don't want to create.
• After clicking on "Add Approval flow" a success toaster will appear to confirm that it is added.
• After clicking on "Add Approval Flow" the following screen will be viewed.

• If user wants to edit the flow then needs to click on "Edit" icon button. After clicking it a modal gets open.
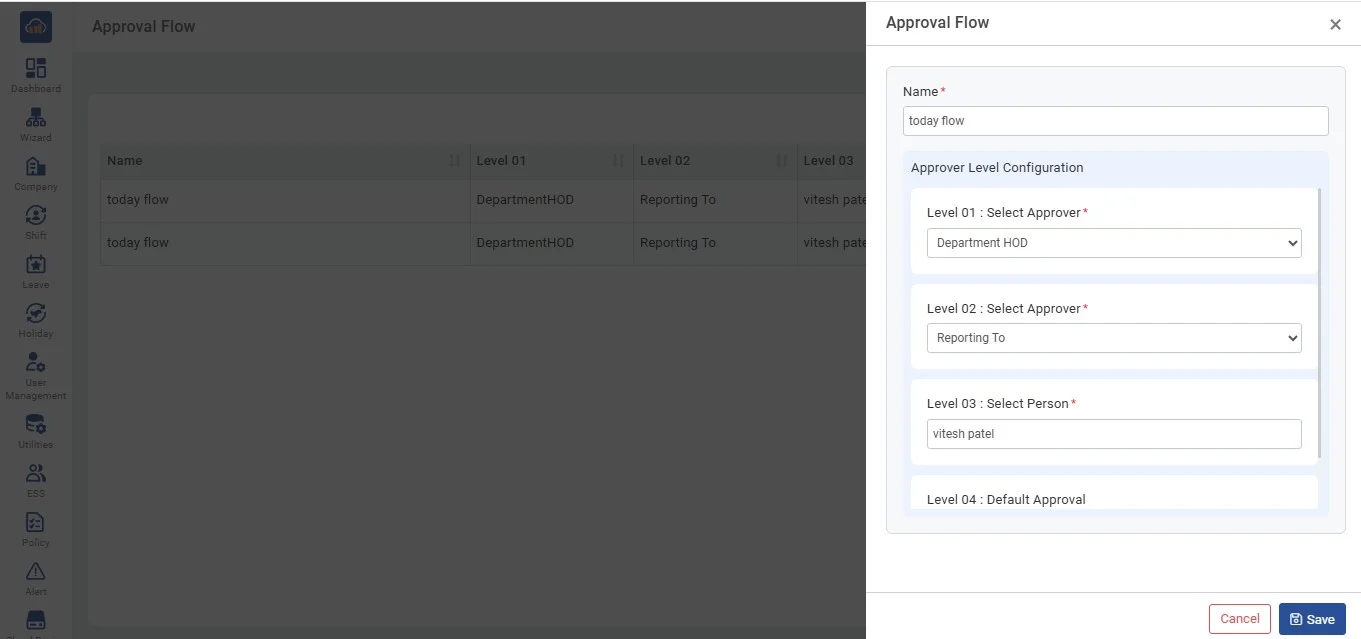
• After updating information click on "Add Approval Flow" button. If user doesnot want to update then can click on cancel button or close icon button which is on top right corner.

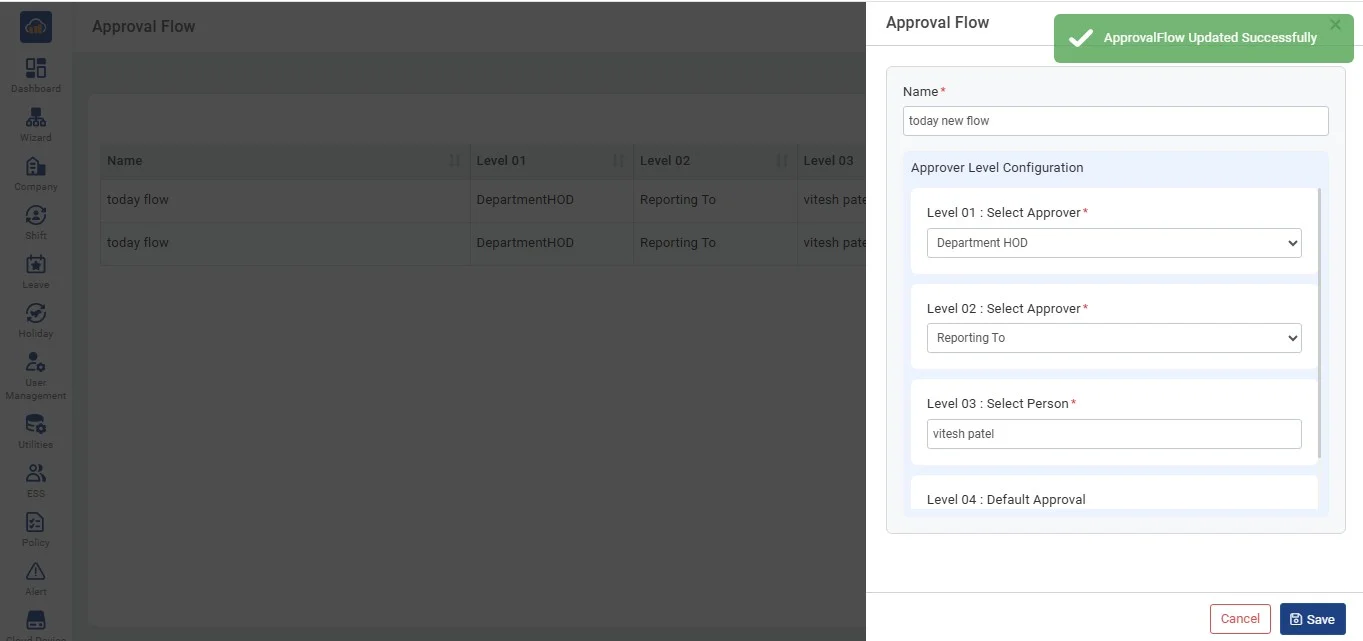
• After clicking on "Add Approval Flow" a success toaster will appear to confirm that it is updated.
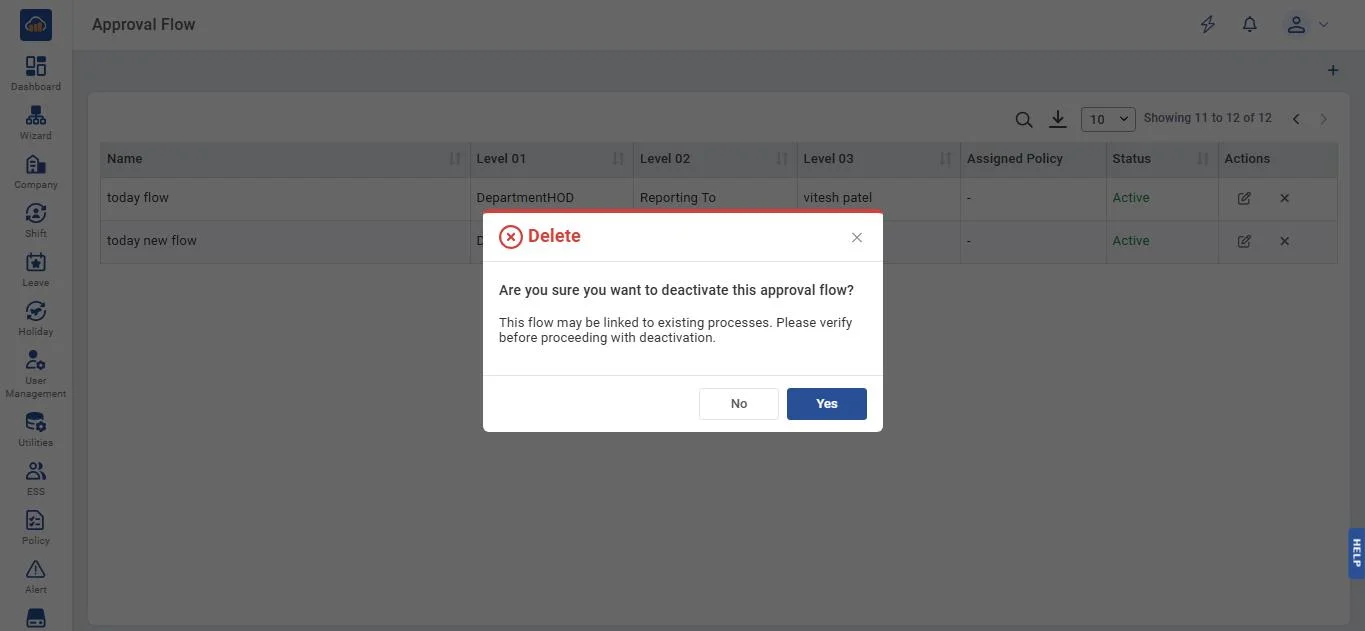
• If user wants to inactive status then can click on "Yes" button. After clicking on it a prompt message will appear to confirm the inactivation. If one doesnot want to inactive then can click on "No" button.
• After clicking on "Yes" button a success toaster will appear to the inactivation.

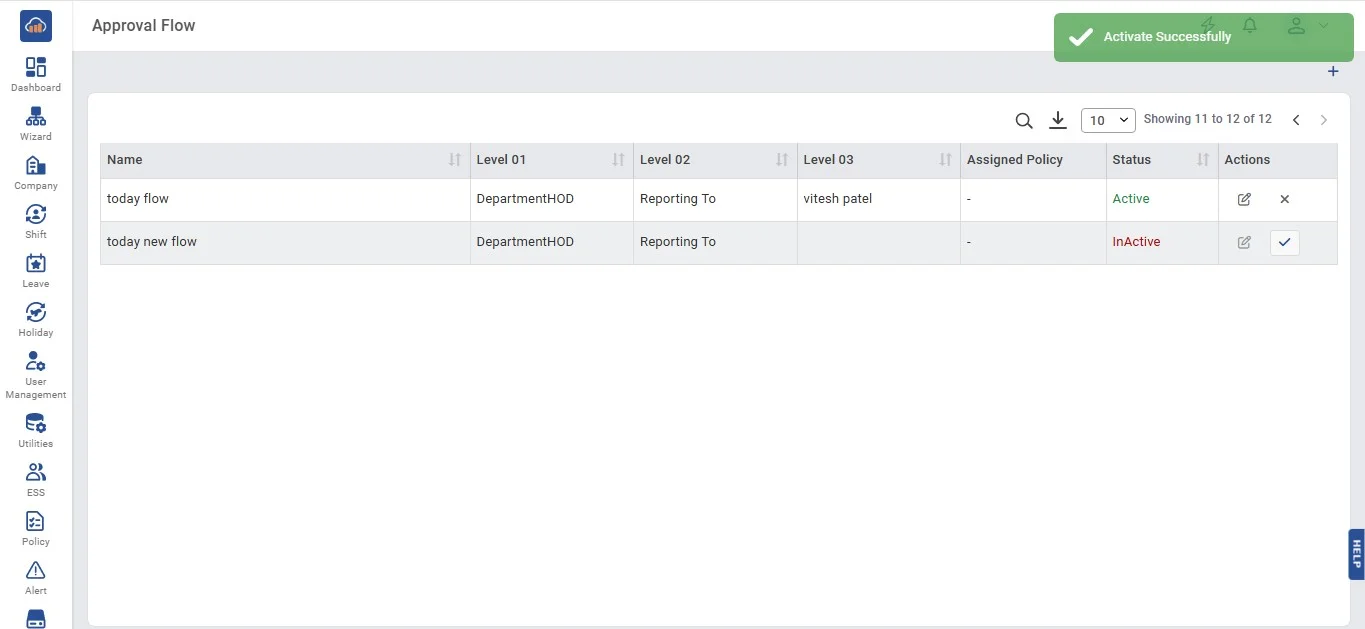
• If user wants to active the status then needs to click on "Activate" icon. After clicking it a success toaster will appear to the activation.
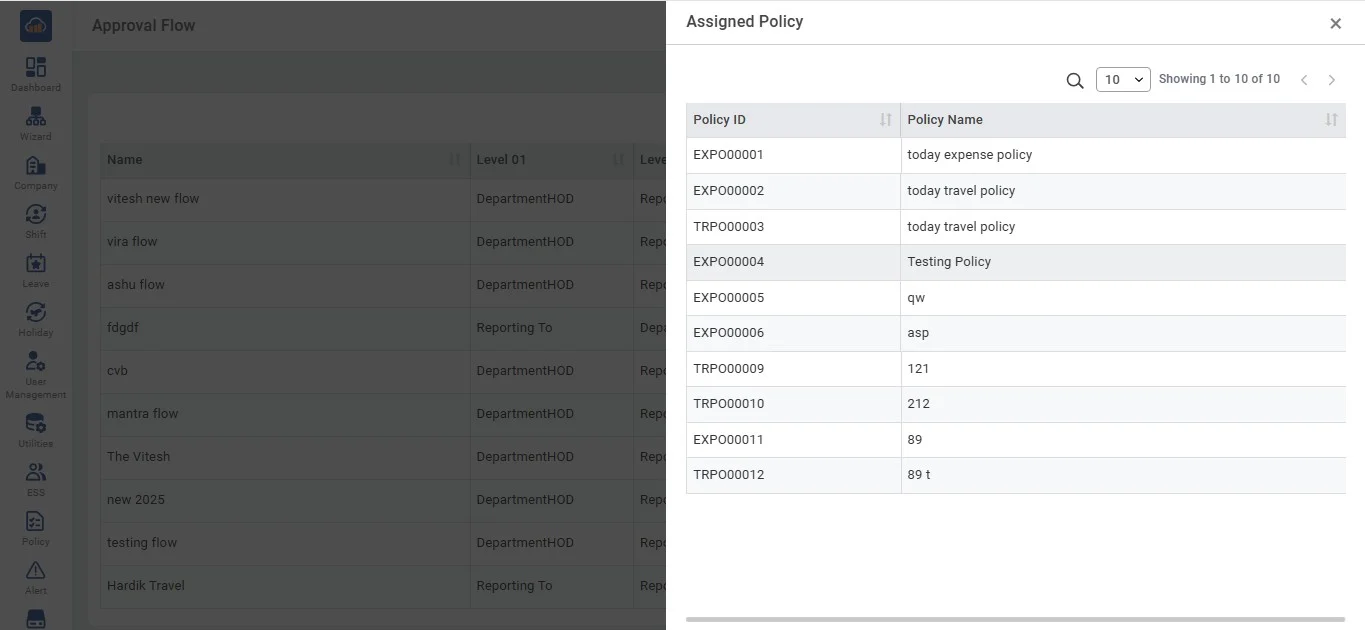
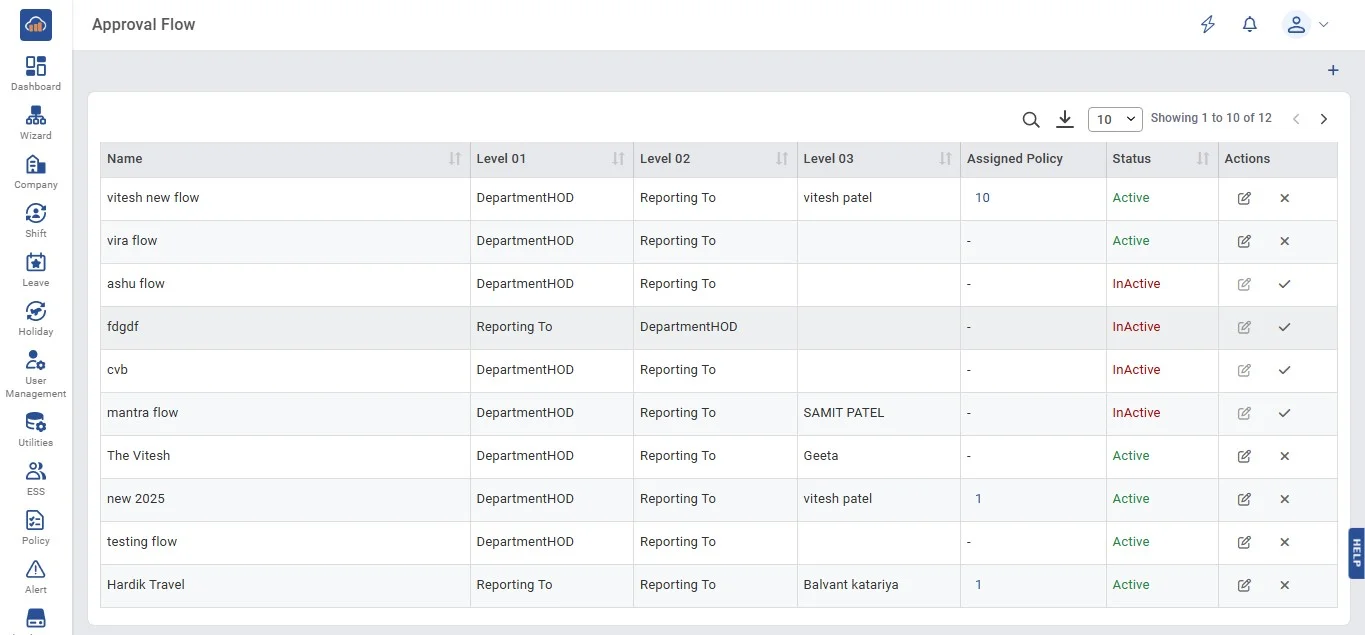
• After the policies are assigned the following screen will be viewed.
• On clicking the "Total Count Numbers" on the assigned policy column of particular approval flow the modal gets open that showcases details of assigned policies.