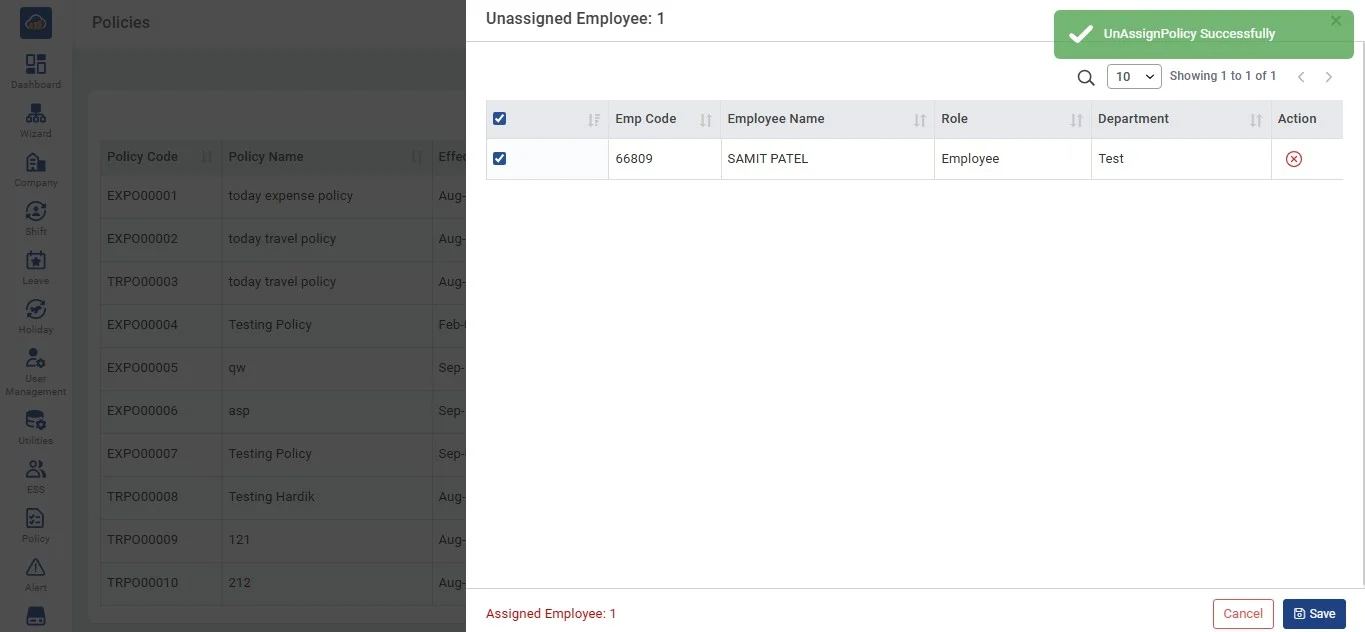
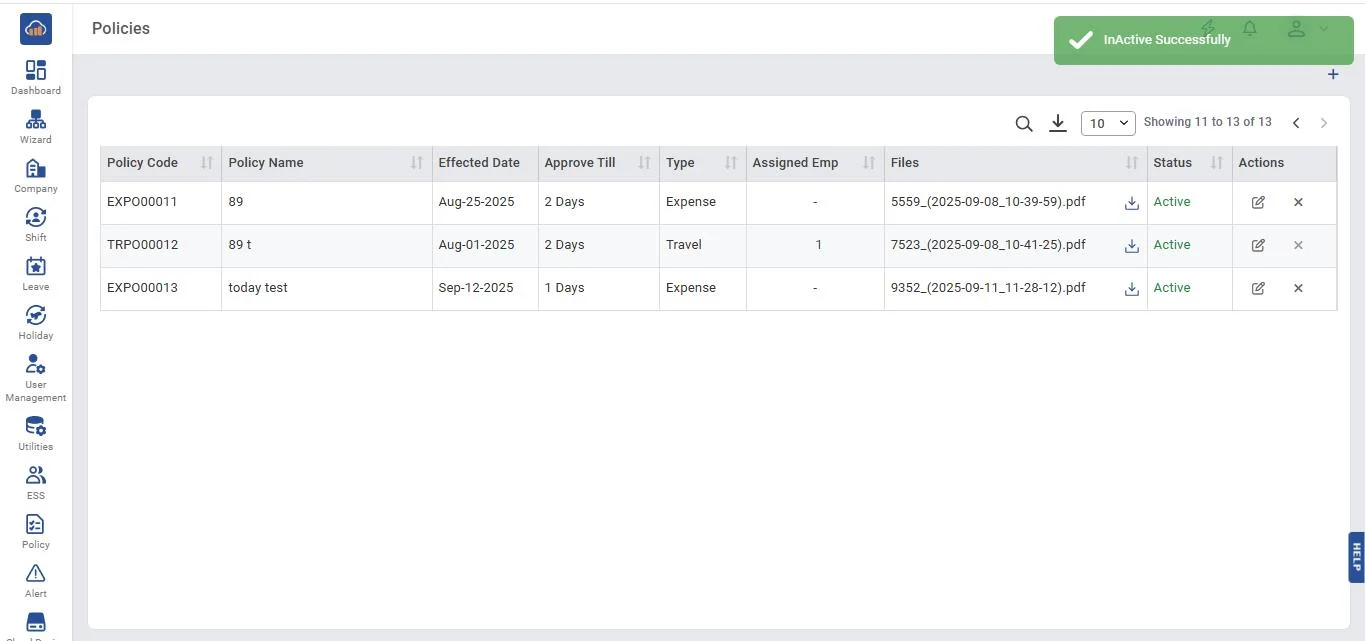
| Field | Details |
|---|---|
| Roles | Admin/Manager Only |
| Type | MINOP - Expense Management System - Policies Module |
| Device | Web Application |
The Policies module in the Expense Management System helps manage and enforce travel and expense rules in the organization. It makes creating, assigning, changing and following policies easy, ensuring everyone sticks to company rules and regulations.
As an Expense Administrator,
I need to easily create, manage, and assign expense policies.
So that all employees follow company guidelines and regulations when submitting expenses.
• When you click on "Expense Preparation", you'll see a menu with two options: Approval Flow and Policies.
• If you click on Policies, there are two possibilities.
• Add Policy
• Edit/Delete Policy (Table View)
• View & Remove Assigned Employee
• When user click the "Add Policy" button, a pop-up window will appear at the bottom right corner of the screen. Here's what you can do in the pop-up:
• After you've filled all details to the mandatory and non-mandatory fields and clicked "Save", the pop-up will close, and you'll be taken back to the "Policies" page. There, you'll see the information you entered displayed in a table.
• *Alert message will automatically disappears.
• If you want to edit a policy, just click on the edit icon, and a pop-up will appear. Here's what you can see and update in the pop-up:
• After you've made your changes, click "Update" to save them. If you decide not to make any updates, you can simply click the close icon in the top right corner.
• After clicking on "Update", the pop-up will close, and you'll be taken back to the "Policies" page. There, you'll see the updated information that you entered displayed in a table.
• *Alert message will automatically disappears.
• If user want to deactivate a policy, click on the "Delete" icon.
• A pop-up will appear in the middle of the screen to confirm deactivation. If you change your mind, just click the "Back" button.
• After you click "Yes" to confirm deactivation, the pop-up will close, and you'll return to the "Policies" page.
• You'll notice that the status of the policy in the table row has been updated to "Inactive".
• Alert message will automatically disappears. Here's what you can see:
• User will notice that after inactivating the policy the "Delete" icon will be replaced with the "Re-activation" icon.
• If the user want to reactivate the policy, just click on the "Re-activation" icon and the page will refresh. Here's what you can see:
• *Alert message will automatically disappears.
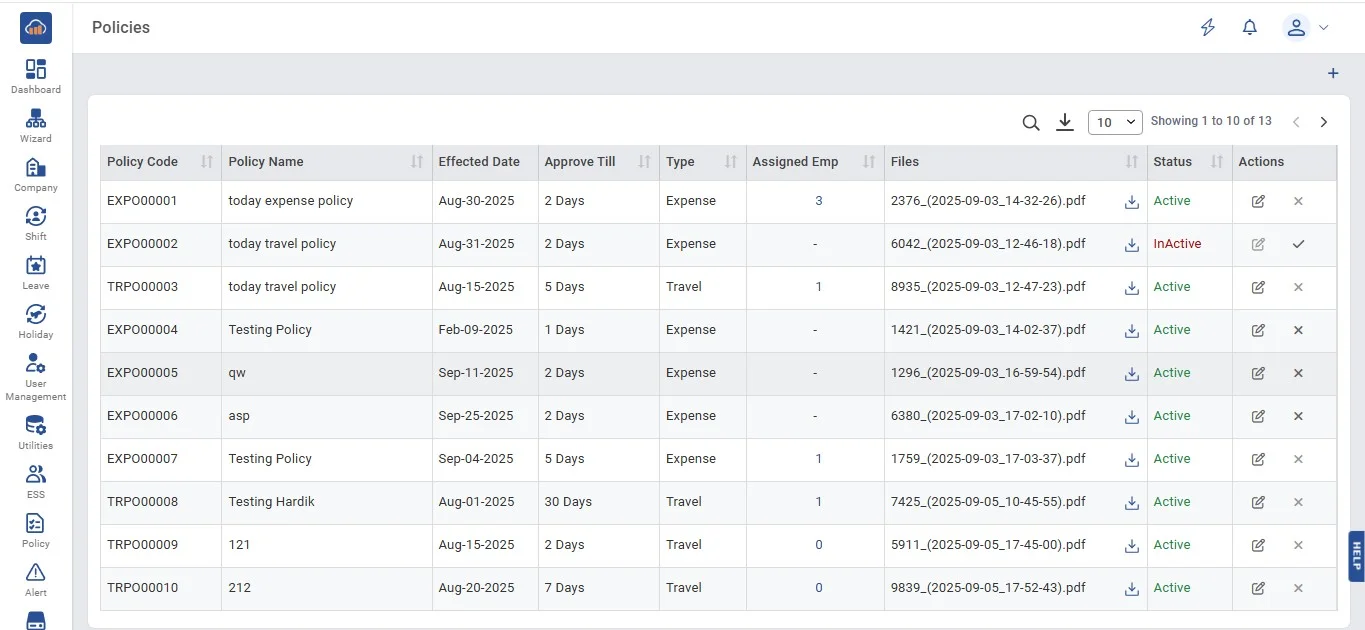
• After you add a policy, you'll see it in the table view. In the table, there's a column called "Assigned Emp", and you'll notice clickable numbers there.
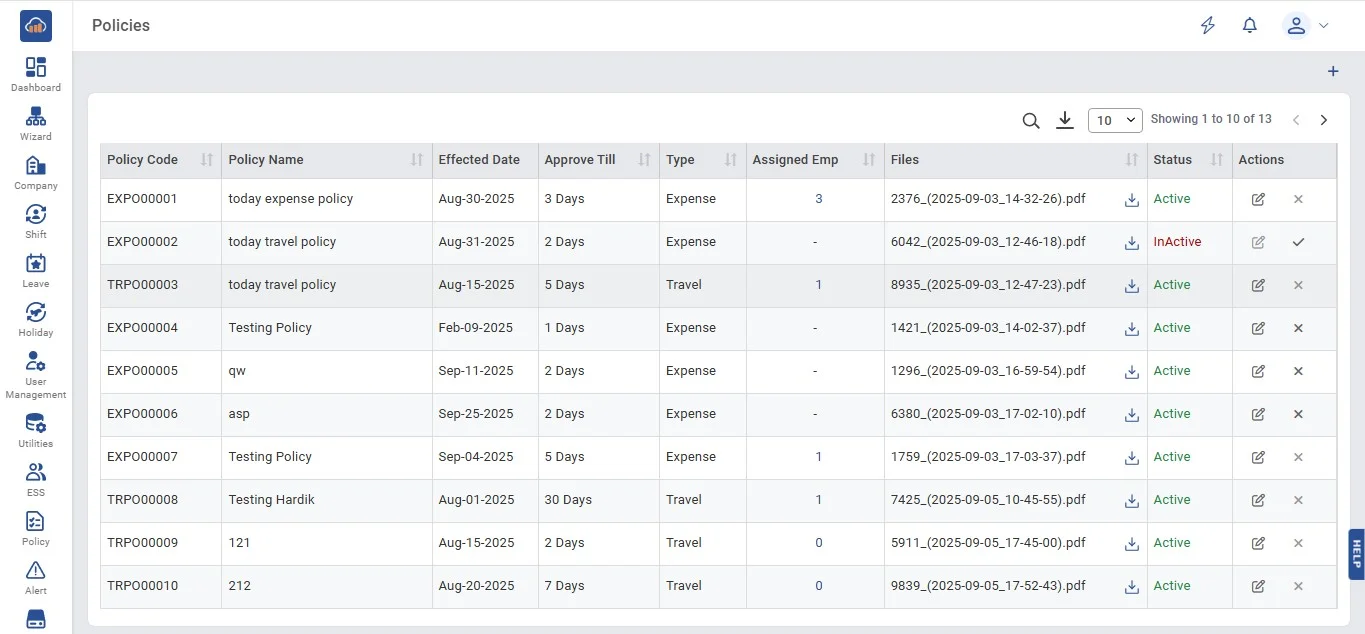
• When you click on one of those numbers, a pop-up will appear at the bottom right of the page.
• This pop-up shows details about the employees assigned to that policy, like their Employee ID, name, role, and department. You'll also see a "Remove" button next to each assigned employee.
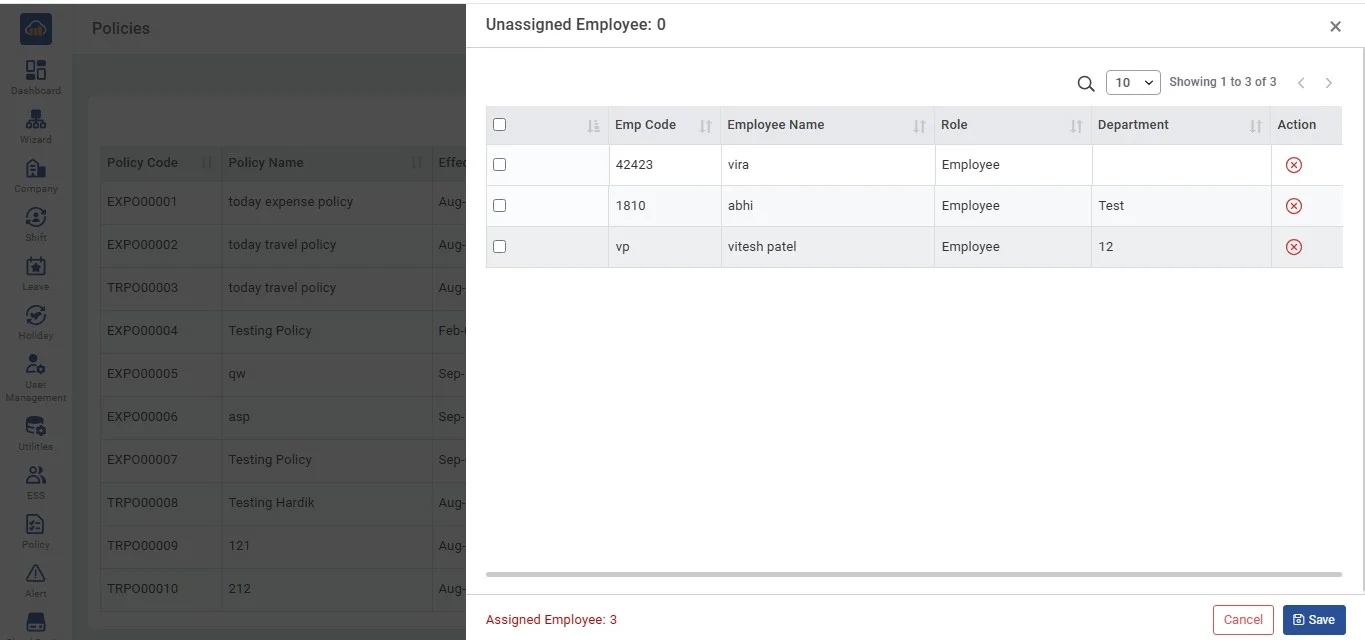
• When you click the "Remove" icon next to an assigned employee:
• When you click the "All" checkbox, the pop-up screen will change to show a "Select All" checkbox (All the assigned employee will be selected) and two buttons at the top of the table: "Remove All" and "Clear".
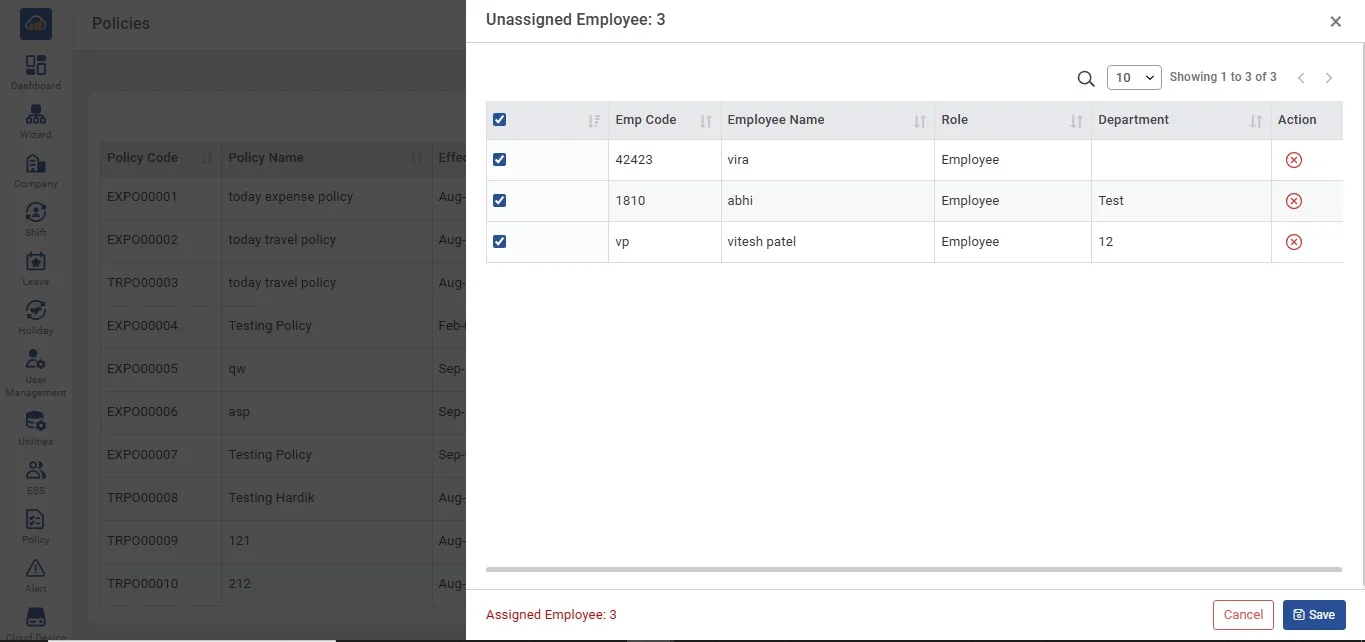
• After Removing the Particular Employee OR Removed All, you can then choose to either "Save" the changes to update the assigned employees. "Cancel" if you don't want to remove anyone. You can also close the pop-up by clicking the "Close" icon at the top right corner.
• After you click "Save" to confirm changes, the pop-up will close, and you'll return to the "Policies" page.