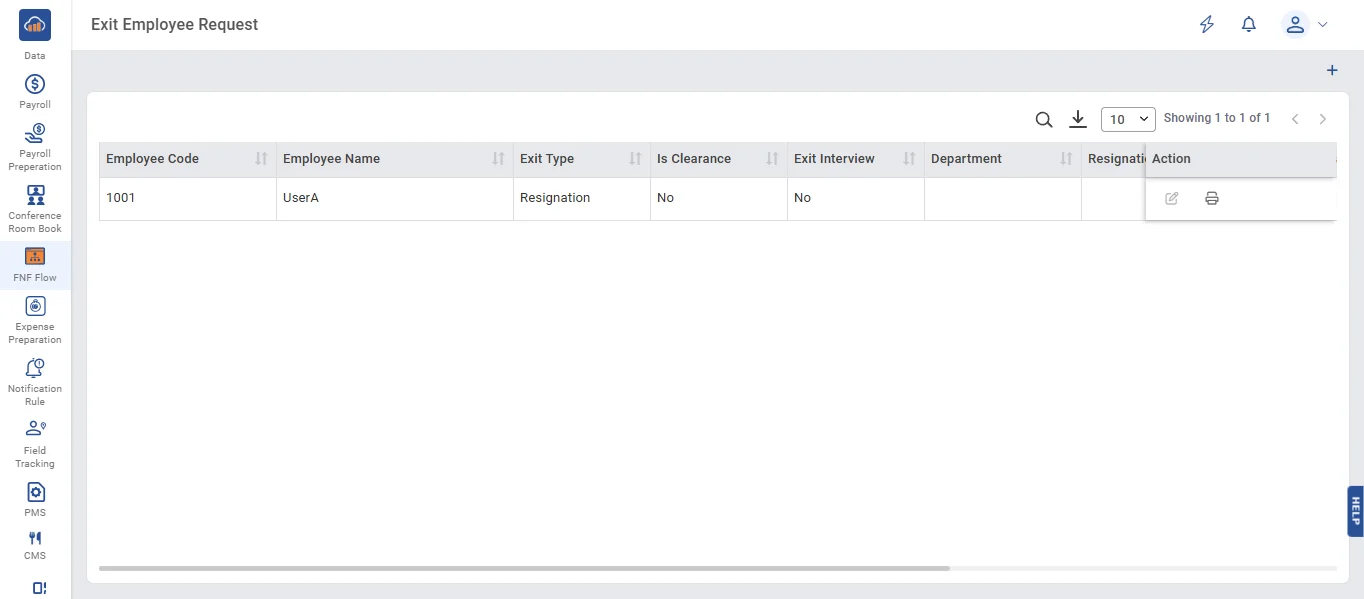
• An Exit Employee Request is a form submitted when an employee resigns from the organization.
• Click the '+ Add' button to create an Exit Employee Request.
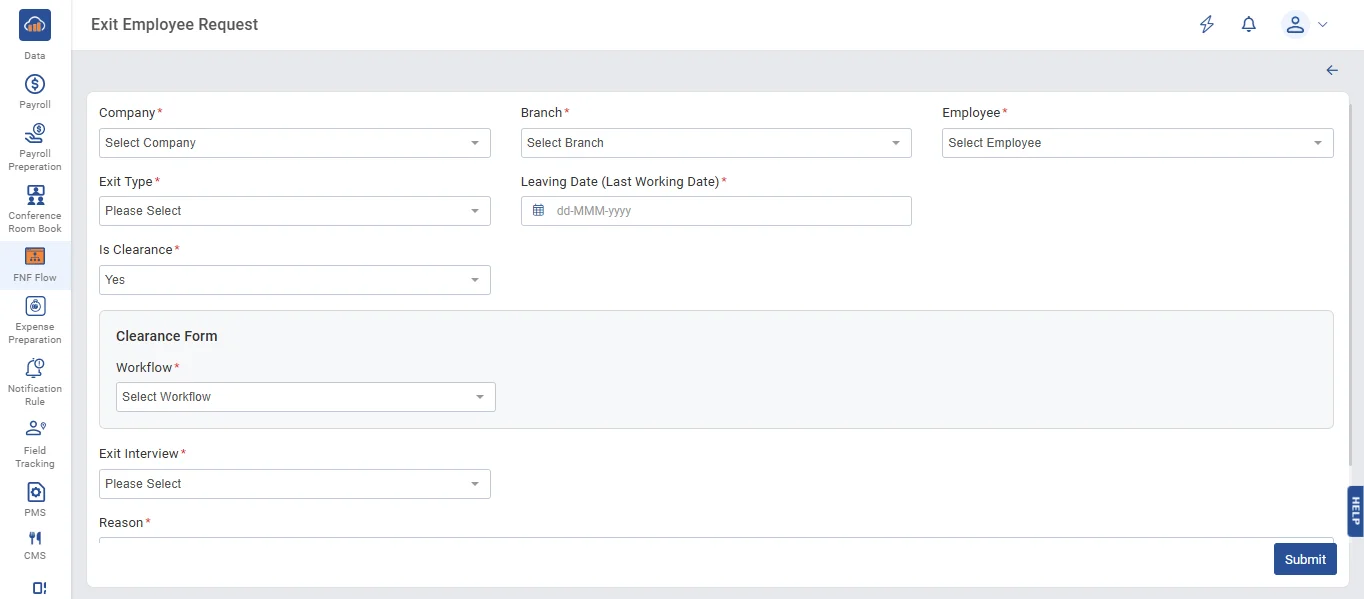
• On the Exit Employee Request page, fill in all the required details, then click the 'Submit' button to save the data.
• When you click the 'Edit' button, the Exit Employee Request page will open.
• On the Exit Employee Request edit page, update the required details and then click the 'Submit' button.
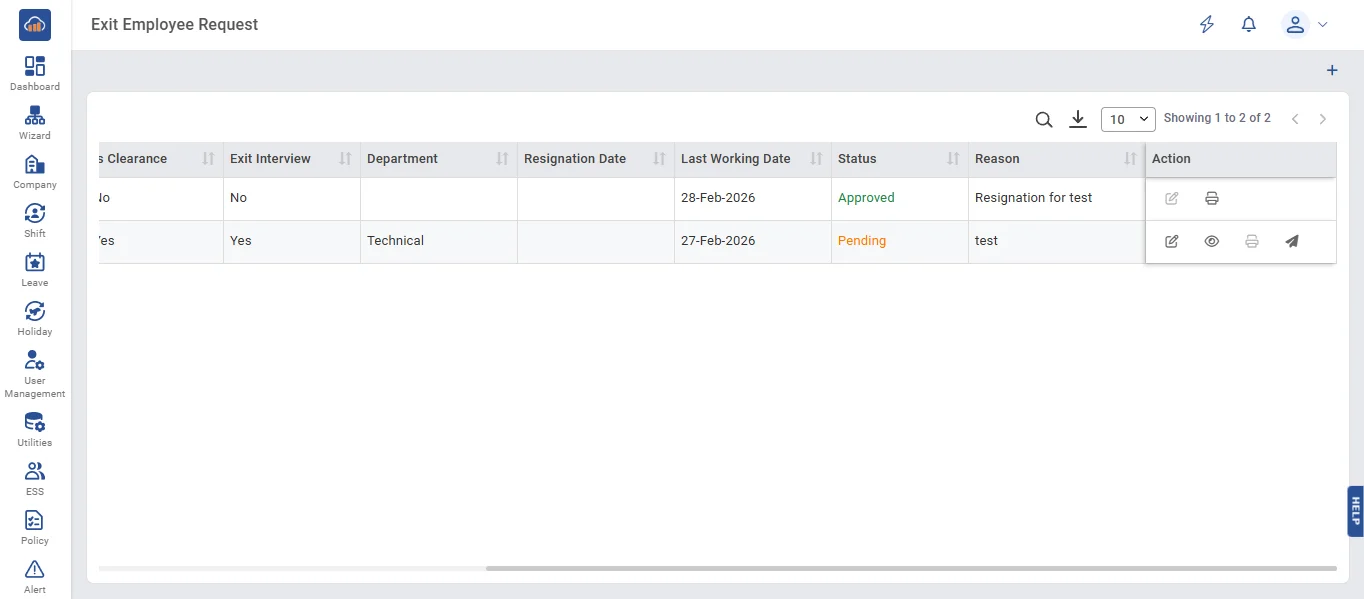
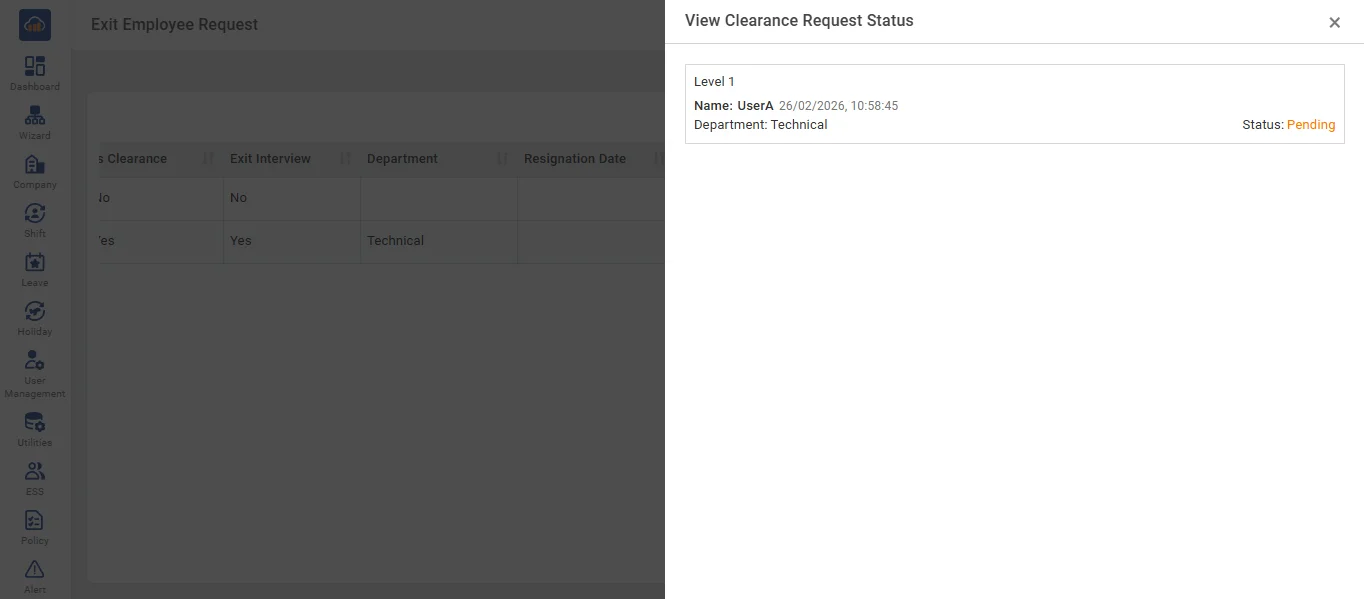
• Click the 'Eye' button to view all details of the workflow approval-level request.
• Click the 'Send' button to forward the request to the employee level by level. For example: First, send it to the first-level authority, then to the second-level authority, and so on.
• When the request is sent, the status will be displayed as 'Sent for Approval', and the 'Send' button will be disabled. You can check the approval status with higher authorities by clicking the 'View' button.
• Then, log in as the first-level employee using the employee login credentials. When the employee logs in, a notification is displayed in the notification bar and is also sent to their email.
• On the Exit Employee Request page, the status is shown as 'Pending for Approval'.
• Click the Eye button to view the status of all approval levels.
• Click the Approval/Rejection button to approve or reject the request of the employee who is in the resignation period.
• A confirmation popup for approval or rejection will appear. Enter the remarks for approval, then click the 'Approve' button. The request will then be successfully approved by the higher authority level.
• If the first-level request is approved, it is automatically forwarded to the next authority level.
• If the next-level authority rejects the employee's request, they must enter remarks and click the 'Reject' button.
• When a request is rejected at any level, a rejection notification is sent to the Admin, the 'Send for Approval' button is enabled, and the status is updated to 'Sent for Re-Request'.
• In the Admin login, click the 'Send for Approval' button to resend the request to the employee whose request was rejected.
• When the request is sent successfully, the status changes to 'Sent for Approval', and the 'Send for Approval' button is disabled.
• To continue the approval process, repeat the steps and approve at all levels.
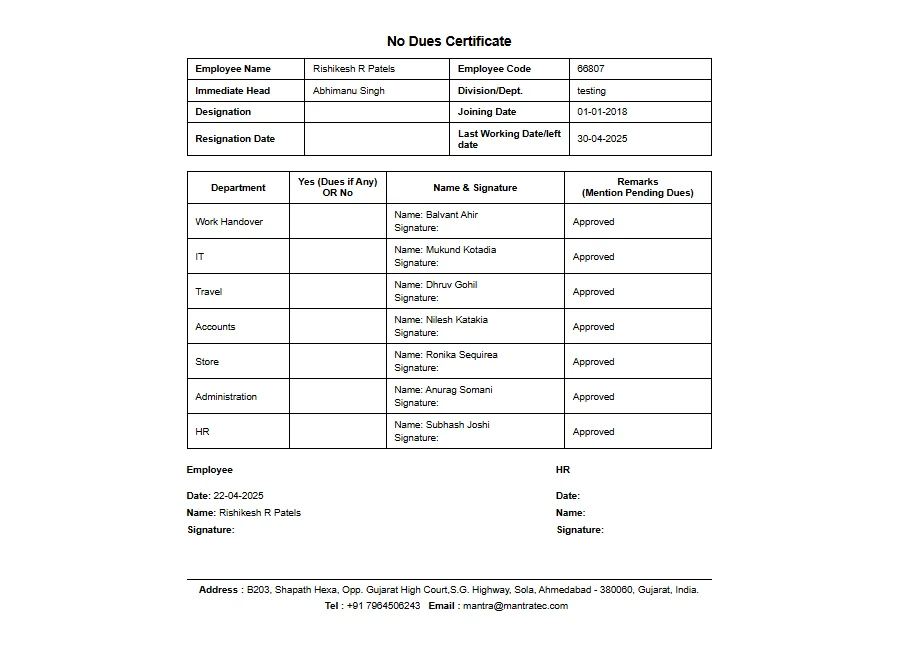
• After all requests are approved, click the 'Print' button to print the 'High-Level Approval Authority' document.
• When you click the 'Print' button, a new window opens. Select the print option, then click the 'Print' button again to print the 'No Due Clearance' report.
• The 'No Due Clearance' print preview is shown below.