Notification Rule Master

Goal/Scope

The Notification Rule Master module allows administrators to create and manage notification rules that are triggered by specific system events such as Leave Requests, Attendance Corrections, Payroll actions, and more. Each rule defines the event trigger, recipient type, notification channels (In-App, Email, Push Notification), and active status. This ensures the right people are notified at the right time for every critical workflow event.

Step 1: Access the Notification Rule Master Page
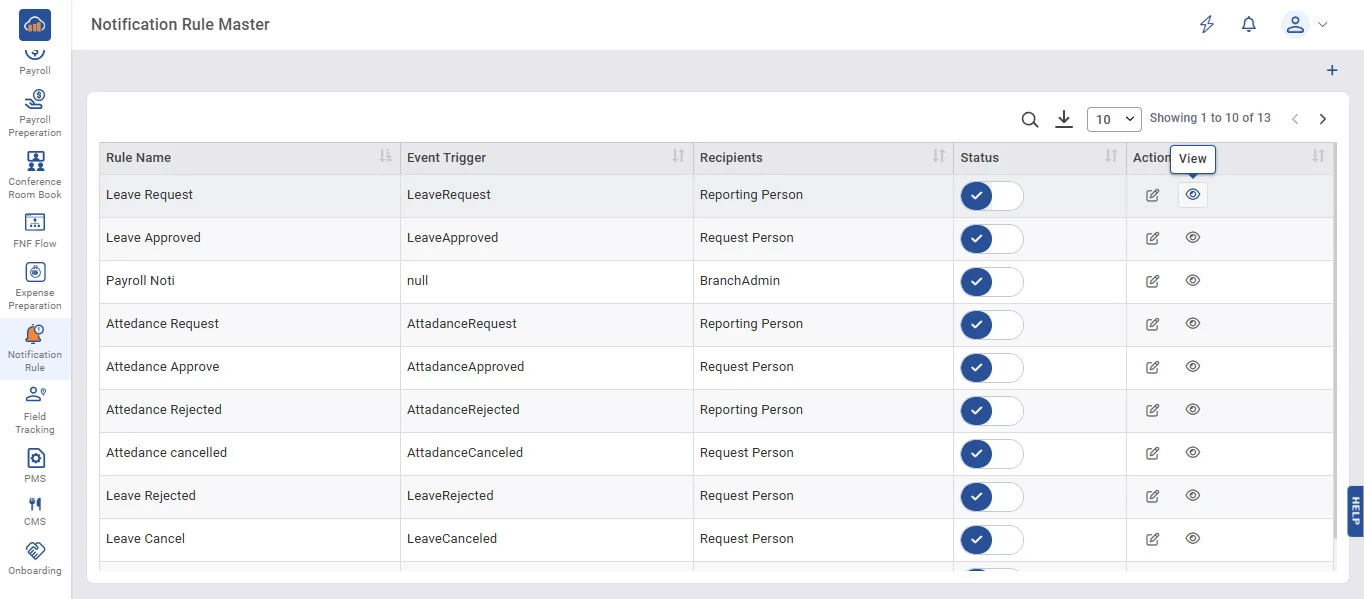
From the left navigation menu, click on "Notification Rule" to expand the submenu. Then select "Notification Rule Master".
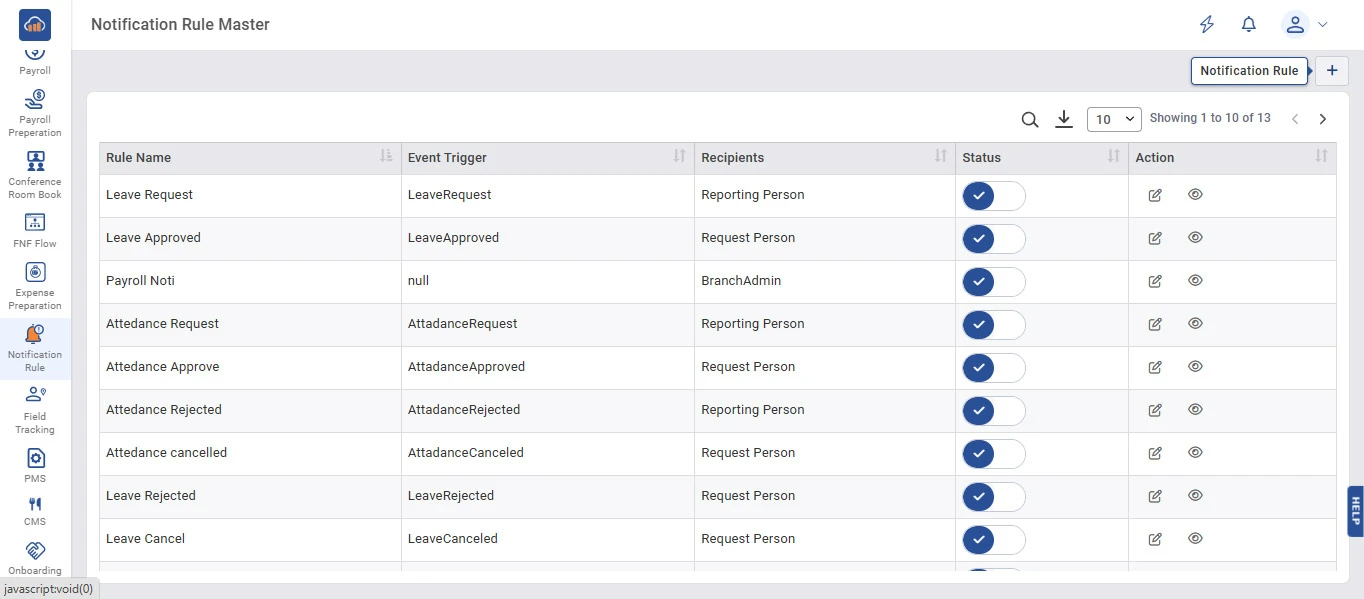
The Notification Rule Master page displays all existing rules in a table with the following columns:

Column Description
Rule Name Name of the notification rule (e.g., Leave Request, Attendance Approve).
Event Trigger The system event that triggers the notification (e.g., LeaveRequest, AttadanceApproved).
Recipients Who receives the notification (e.g., Reporting Person, Request Person, BranchAdmin).
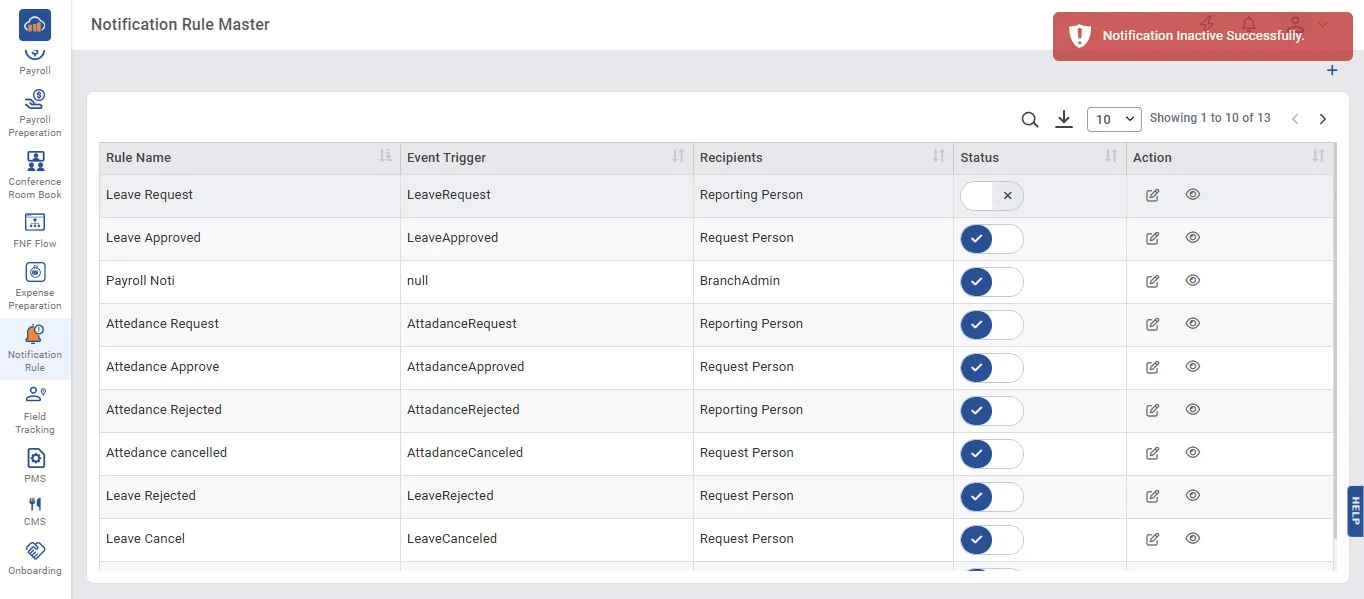
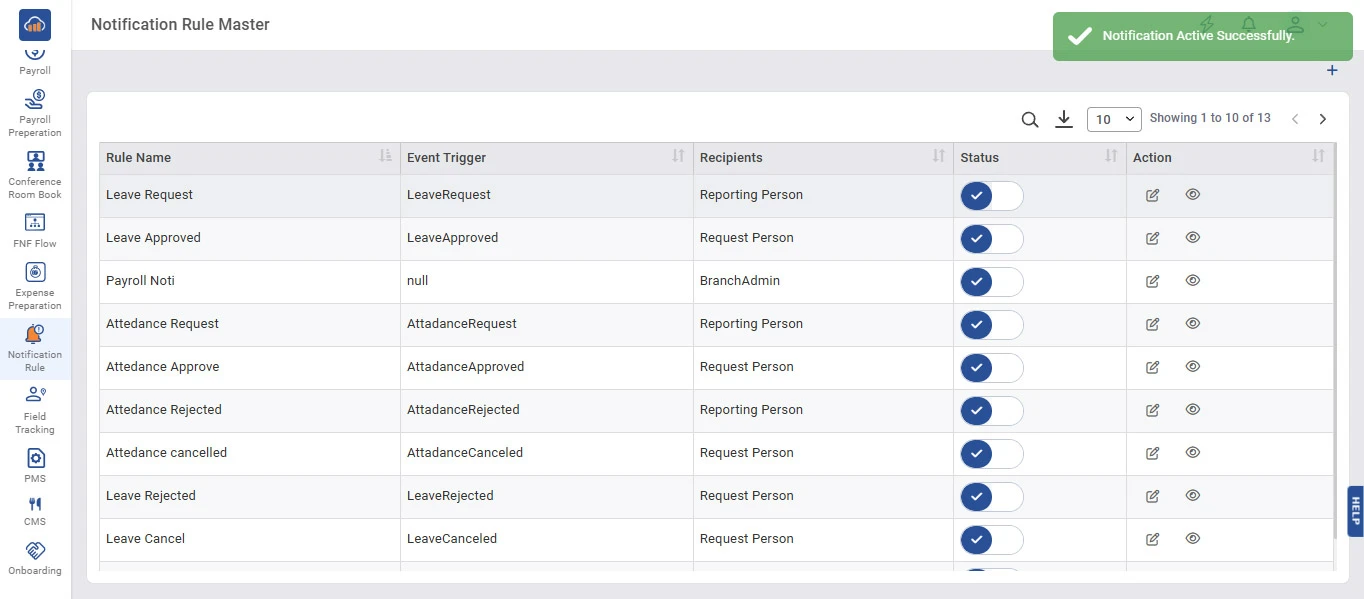
Status Toggle switch showing whether the rule is Active or Inactive.
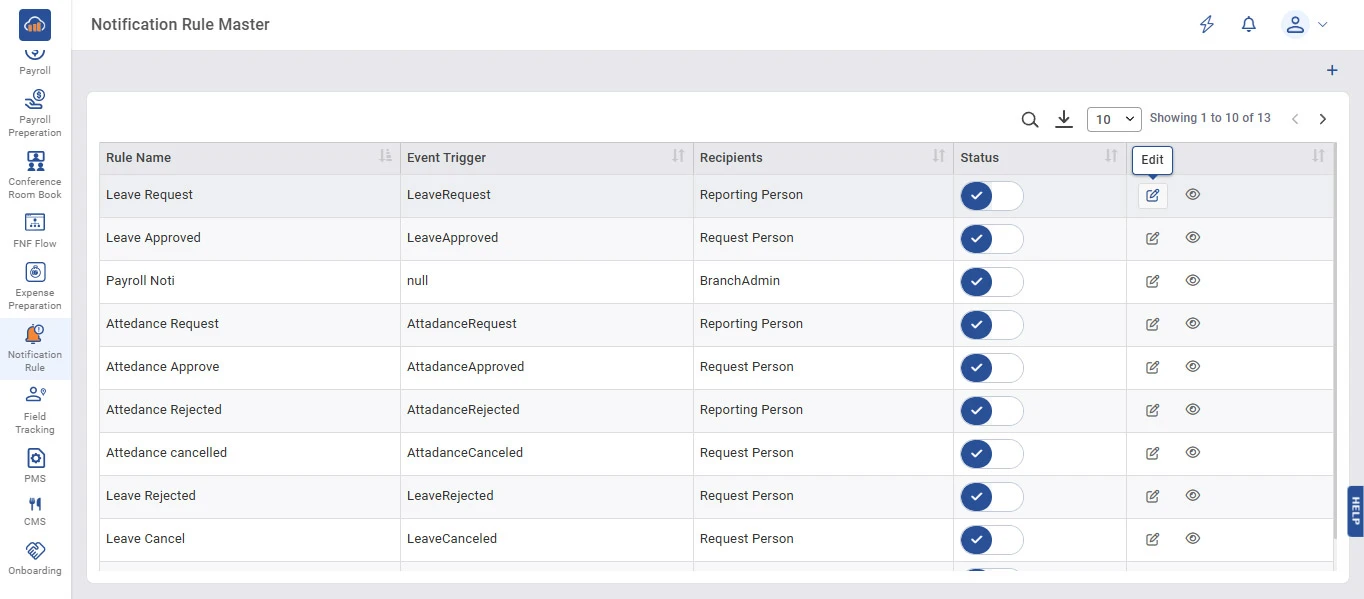
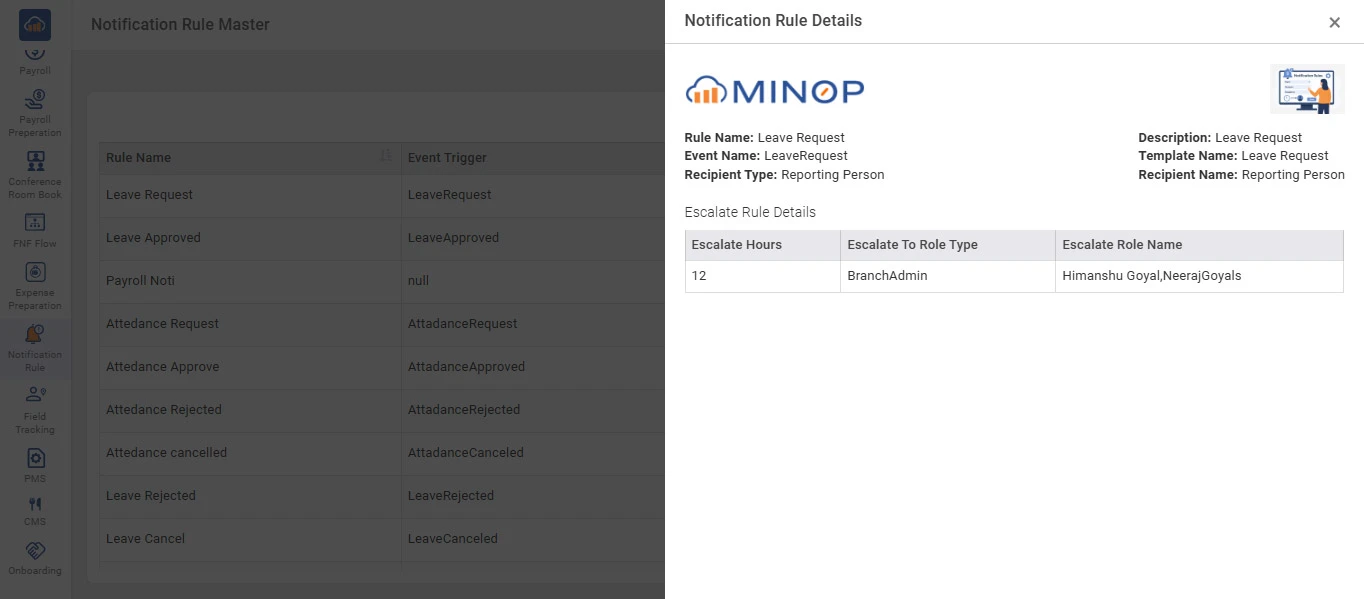
Action Options to Edit or View the notification rule.
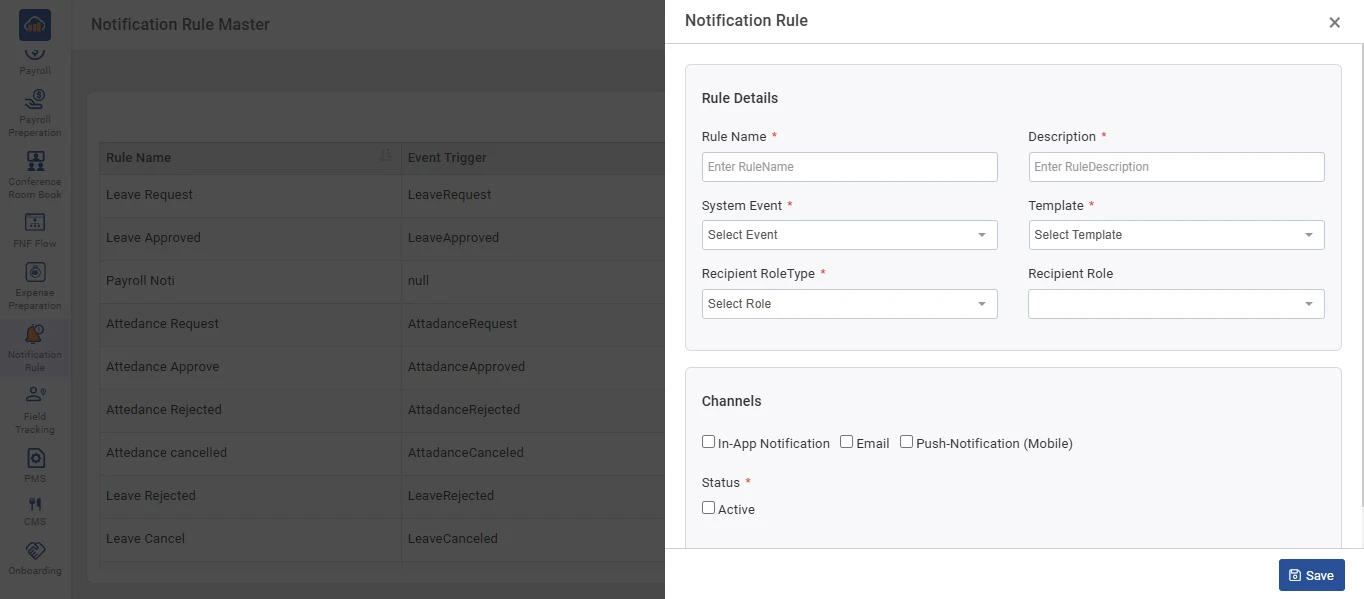
Users can use the Search icon to find specific rules, the Download icon to export data, and control pagination using the page size dropdown. The "Notification Rule" button and "+" icon at the top right allow creating new rules.

img

Step 2: Create a New Notification Rule

To create a new notification rule, click the "+" icon button at the top right corner of the page.

A "Notification Rule" side panel will open with the following sections:

Rule Details

Field Description
Rule Name * Enter the name of the notification rule (mandatory).
Description * Enter a description for the rule (mandatory).
System Event * Select the system event that will trigger the notification (mandatory).
Template * Select the notification template to use (mandatory).
Recipient RoleType * Select the recipient role type from the dropdown (mandatory).
Recipient Role Select the specific recipient role (e.g., Select Employee).

Channels

Select one or more notification delivery channels:

    I. In-App Notification - Sends notification within the application.

    II. Email - Sends notification via email.

    III. Push-Notification (Mobile) - Sends push notification to mobile devices.

Status

Check the "Active" checkbox to enable the rule immediately after creation.

After filling in all details, click "Save" to create the notification rule.

img

Step 3: Edit a Notification Rule

To edit an existing notification rule, click the "Edit" icon (pencil icon) in the Action column of the respective rule row.

img

The "Notification Rule" side panel will open with all pre-filled values for the selected rule, including Rule Name, Description, System Event, Template, Recipient RoleType, Recipient Role, Channels, and Status.

Modify the details as necessary and click "Save" to update the rule. Click the "X" icon at the top right corner to close without saving.

img

Step 4: View Notification Rule Details

To view the complete details of a notification rule, click the "View" icon (eye icon) in the Action column of the respective rule row.

img

A "Notification Rule Details" side panel will open displaying:

Section Details
Rule Name Name of the notification rule.
Description Description of the rule.
Event Name The system event that triggers the notification.
Template Name The template used for the notification.
Recipient Type The type of recipient (e.g., Reporting Person).
Recipient Name The specific recipient name.
Escalate Rule Details Shows escalation hours, escalate-to role type, and escalate role name.

The panel also displays the Minop logo and a preview of the notification template at the top right corner.

img

Step 5: Activate / Deactivate a Notification Rule

Each notification rule has a Status toggle switch in the Status column.

To deactivate a rule, click the toggle switch to turn it off. A success toaster message "Notification Inactive Successfully." will appear at the top right corner, confirming the rule has been deactivated. The toggle will show an X mark.

img

To reactivate a rule, click the toggle switch again to turn it on. A success toaster message "Notification Active Successfully." will appear at the top right corner, confirming the rule has been activated. The toggle will show a check mark.

img