Notification Rule Config

Goal/Scope

The Notification Rule Config module allows administrators to configure advanced notification rules based on specific conditions and thresholds. Rules are organized into three categories: Attendance, Leave, and Payroll. Each rule defines the triggering event, condition operator, threshold value, and notification delivery channels (In-App, Push, Email, SMS) along with scheduling options like day, repeat frequency, start time, and reminder intervals.

Step 1: Access the Notification Rule Config Page

From the left navigation menu, click on "Notification Rule" to expand the submenu. Then select "Notification rule config".
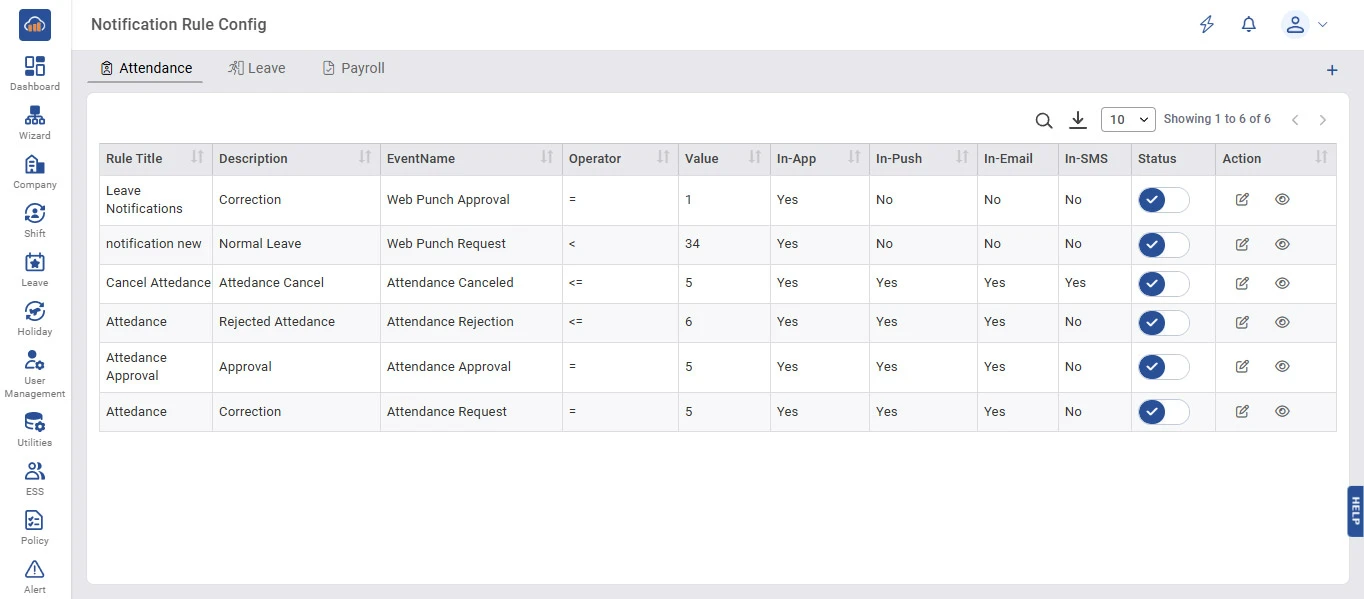
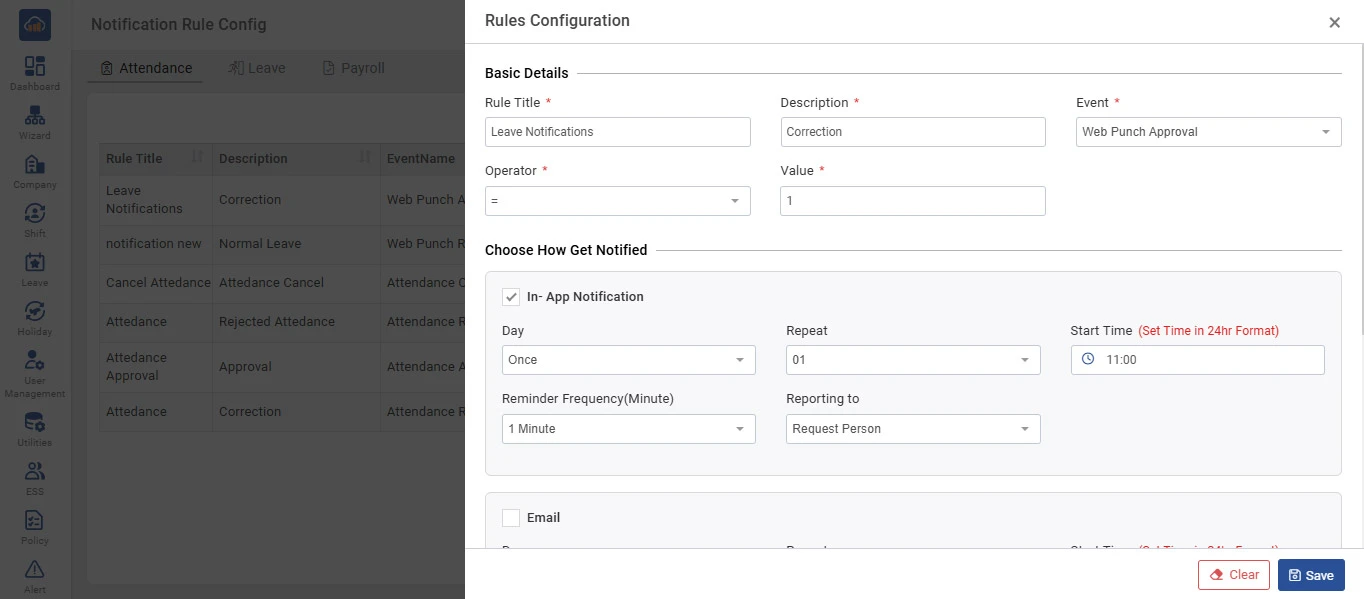
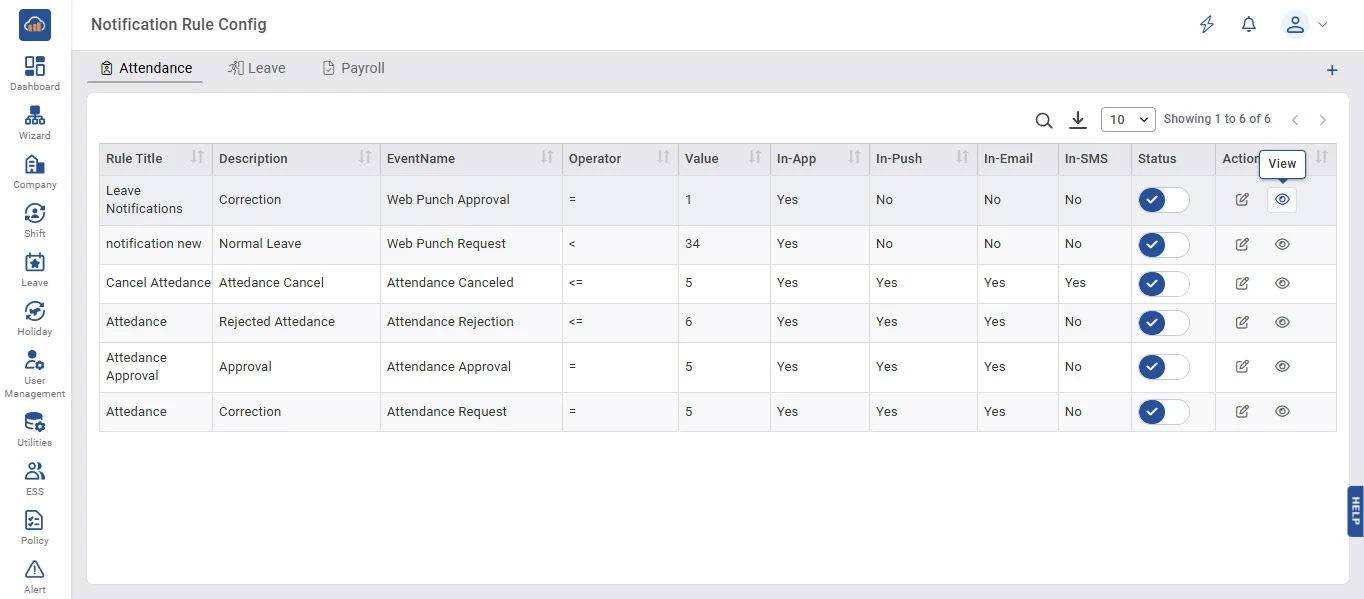
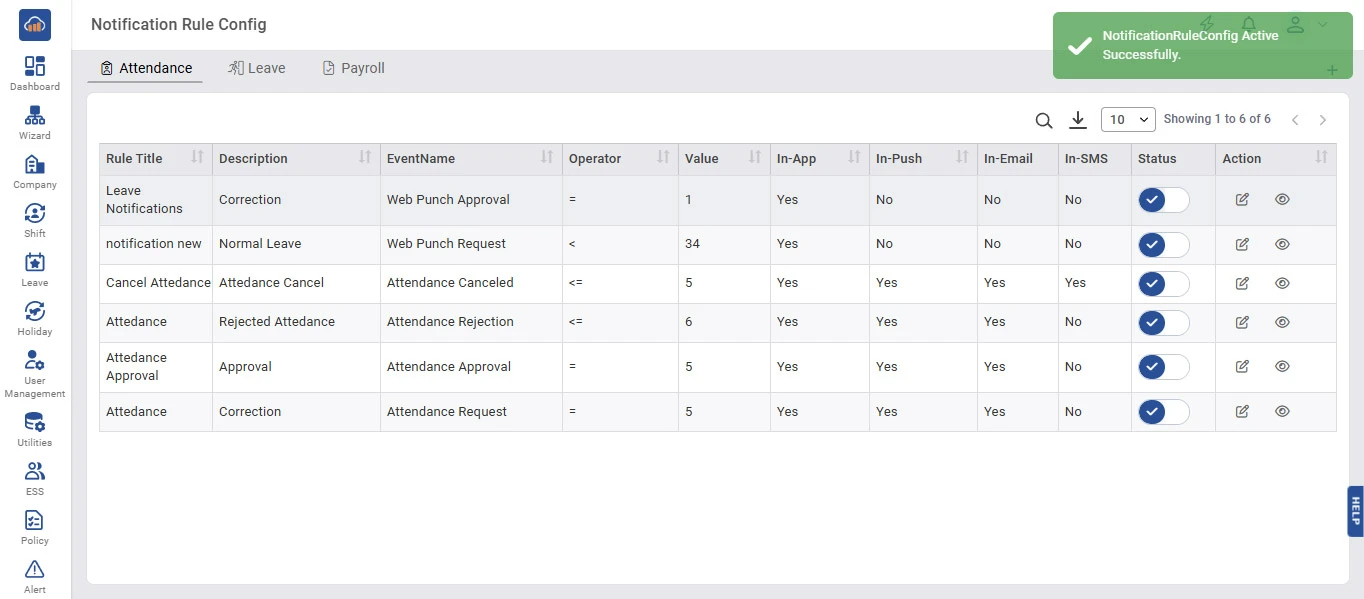
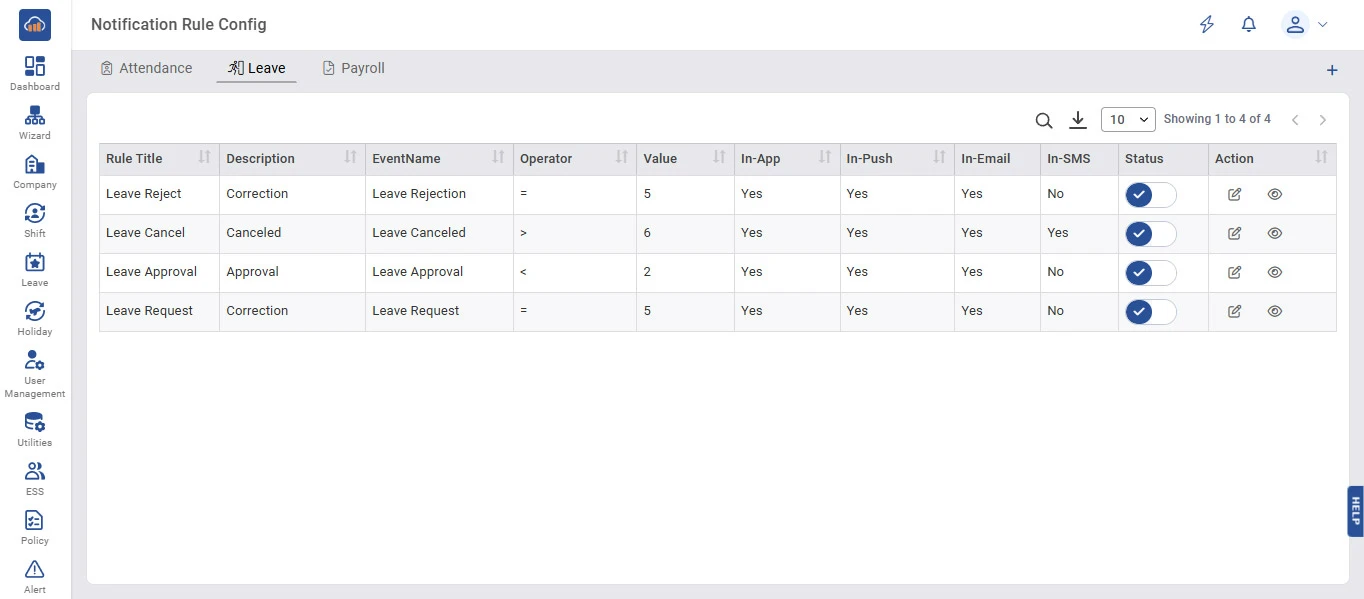
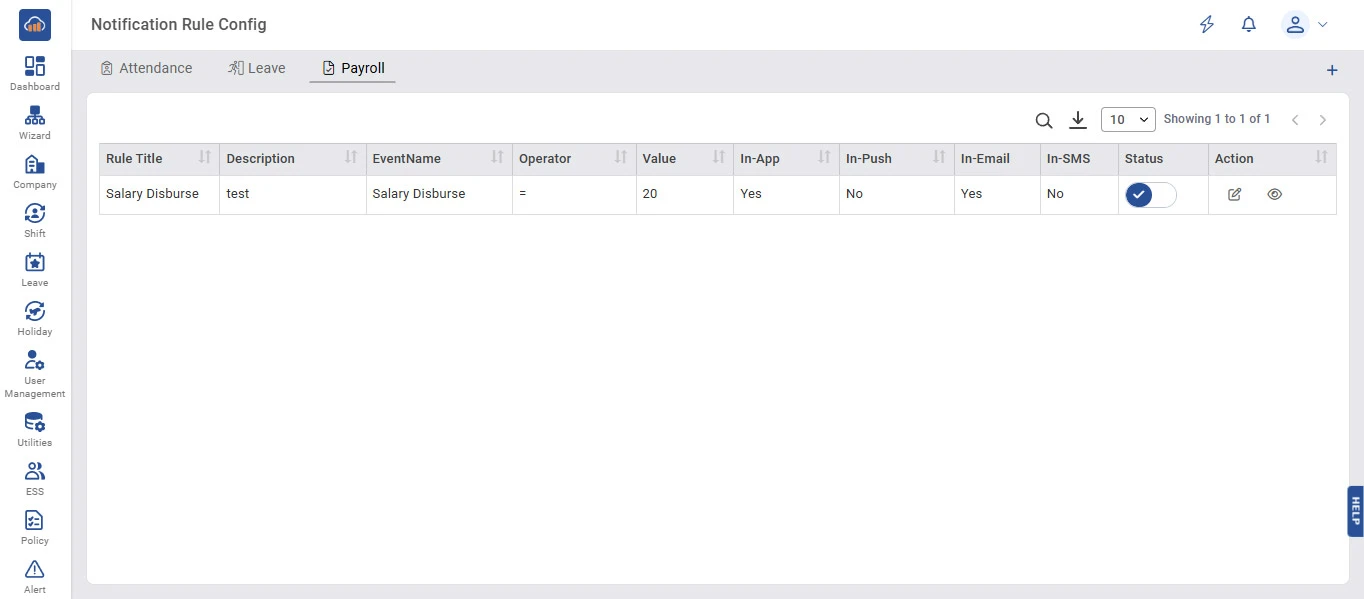
The Notification Rule Config page opens with three tabs at the top: Attendance, Leave, and Payroll. The Attendance tab is selected by default.

Each tab displays the configured rules in a table with the following columns:

Column Description
Rule Title Name of the notification rule configuration.
Description Brief description of the rule (e.g., Correction, Approval, Normal Leave).
EventName The event that triggers the rule (e.g., Web Punch Approval, Attendance Canceled).
Operator Condition operator used for the rule (e.g., =, <, <=).
Value Threshold value for the condition.
In-App Whether In-App notification is enabled (Yes/No).
In-Push Whether Push notification is enabled (Yes/No).
In-Email Whether Email notification is enabled (Yes/No).
In-SMS Whether SMS notification is enabled (Yes/No).
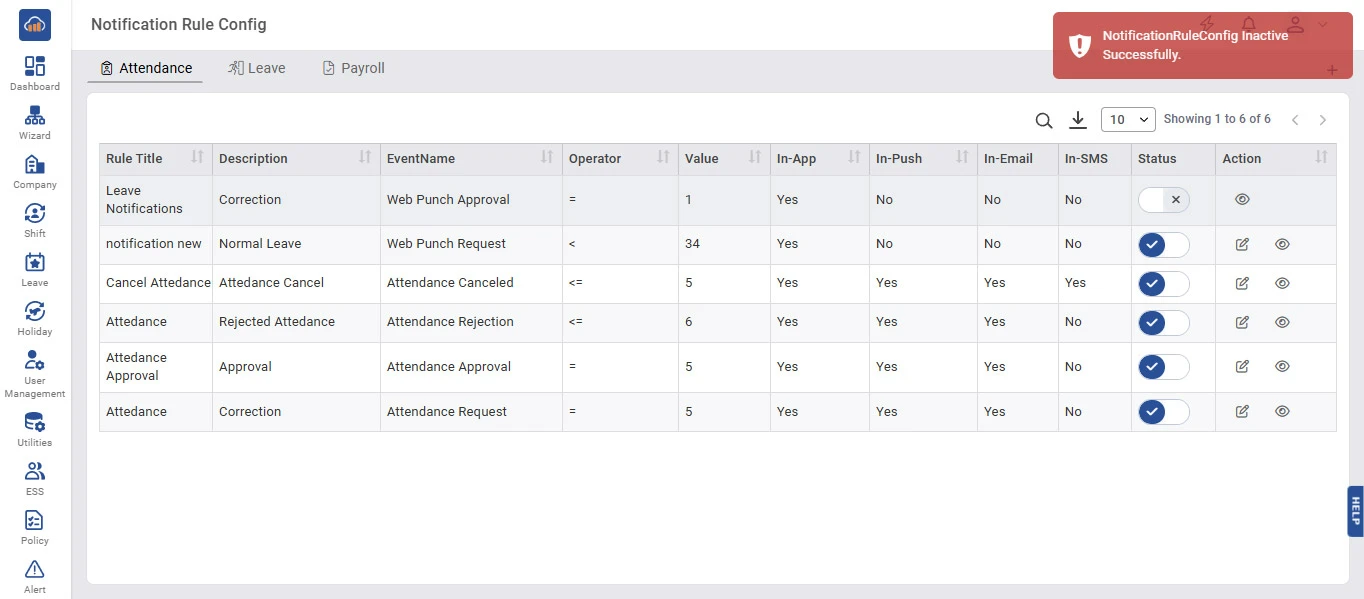
Status Toggle switch showing whether the rule is Active or Inactive.
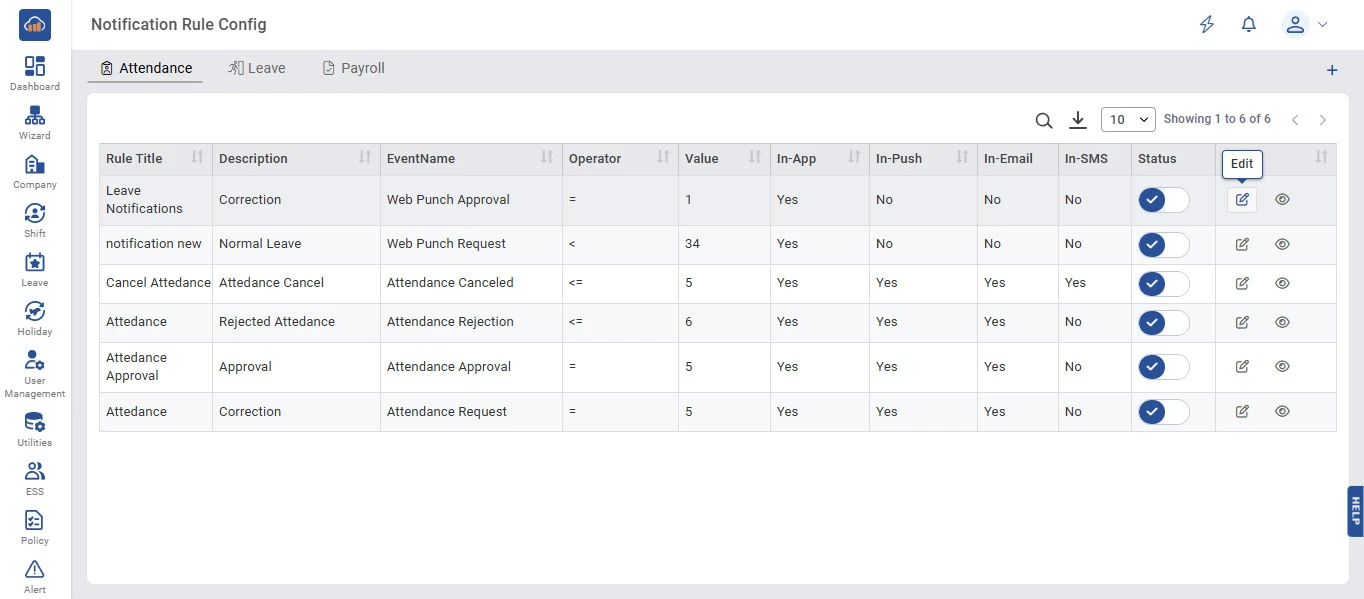
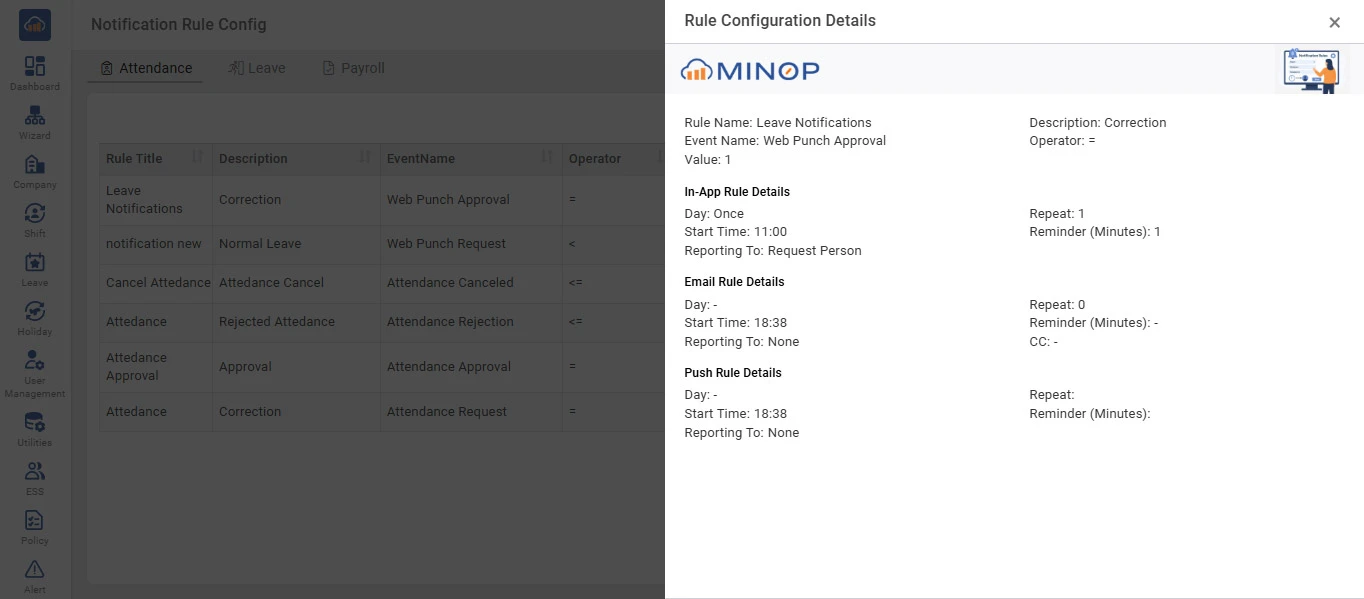
Action Options to Edit or View the rule configuration.
img

Step 2: Create a New Rule Configuration

To create a new rule configuration, click the "+" icon button at the top right corner of the page.

A "Rules Configuration" side panel will open with the following sections:

Basic Details

Field Description
Rule Title * Enter the title of the rule (mandatory).
Description * Enter a description for the rule (mandatory).
Event * Select the triggering event from the dropdown (mandatory).
Operator * Select the condition operator (e.g., =, <, <=, >) (mandatory).
Value * Enter the threshold value for the condition (mandatory).

Choose How Get Notified

The panel provides configuration options for each notification channel. Enable the checkbox next to each channel to configure it:

In-App Notification:

Field Description
Day Select when to send (e.g., Once, Daily, Weekly).
Repeat Number of times to repeat the notification.
Start Time Set the notification time in 24hr format.
Reminder Frequency (Minute) Set the reminder interval in minutes.
Reporting to Select who should receive the notification.
img

Email & Push-Notification (Mobile):

Scrolling down reveals the Email and Push-Notification (Mobile) channel configurations, each with the same scheduling fields (Day, Repeat, Start Time, Reminder Frequency, Reporting to). The Email channel also has an additional CC field to add CC recipients.

After configuring all required channels, click "Save" to create the rule. Click "Clear" to reset all fields.

img

Step 3: Edit a Rule Configuration

To edit an existing rule configuration, click the "Edit" icon (pencil icon) in the Action column of the respective rule row.

img

The "Rules Configuration" side panel will open with all pre-filled values for the selected rule, including Basic Details (Rule Title, Description, Event, Operator, Value) and all channel configurations.

Modify the details as necessary and click "Save" to update the rule. Click "Clear" to reset all fields to default values.

img

Step 4: View Rule Configuration Details

To view the complete details of a rule configuration, click the "View" icon (eye icon) in the Action column of the respective rule row.

img

A "Rule Configuration Details" side panel will open displaying the following information:

Section Details
Header Rule Name, Description, Event Name, Operator, and Value.
In-App Rule Details Day, Start Time, Reporting To, Repeat count, and Reminder (Minutes).
Email Rule Details Day, Start Time, Reporting To, Repeat count, Reminder (Minutes), and CC.
Push Rule Details Day, Start Time, Reporting To, Repeat count, and Reminder (Minutes).

The panel also displays the Minop logo and a preview thumbnail at the top. Click the "X" icon to close the details panel.

img

Step 5: Activate / Deactivate a Rule Configuration

Each rule configuration has a Status toggle switch in the Status column.

To deactivate a rule, click the toggle switch to turn it off. A success toaster message "NotificationRuleConfig Inactive Successfully." will appear at the top right corner. The toggle will show an X mark.

img

To reactivate a rule, click the toggle switch again to turn it on. A success toaster message "NotificationRuleConfig Active Successfully." will appear at the top right corner. The toggle will show a check mark.

img

Step 6: Leave Tab

Click on the "Leave" tab at the top to view notification rule configurations specific to leave-related events.

The table displays leave-specific rules such as Leave Reject, Leave Cancel, Leave Approval, and Leave Request with their respective event names, operators, values, and channel settings.

The same actions (Edit, View, Activate/Deactivate) are available for leave rules as described in the previous steps.

img

Step 7: Payroll Tab

Click on the "Payroll" tab at the top to view notification rule configurations specific to payroll-related events.

The table displays payroll-specific rules such as Salary Disburse with its respective event name, operator, value, and channel settings.

The same actions (Edit, View, Activate/Deactivate) are available for payroll rules as described in the previous steps.

img